Aurora Photography
Introduction
Aurora photography requires special techniques and approaches. Even though auroras are active all year round, they are best seen during the dark seasons, i.e. in late autumn throughout early spring (northern hemisphere). In the northern hemisphere auroras are most common along the arctic circle and are called Aurora Borealis while in the southern hemisphere they are called Aurora Australis. My experience with auroras is restricted to the time between September and March, while my first viewing took place in September 1995 in Iceland. Even though this is not the time with extremely low temperatures, the nights are in the vicinity of 0°C and below. My recent viewings are all from our yearly trip to Finnish Lapland in the winter time early in the year, typically in February or March. This time of the year brings temperatures into the range between -10°C and -30°C. If you are seeking for auroras, you need to stay outside for a longer time period (several hours) and your equipment as well as yourself needs to be prepared for these long stays in the cold.
Watching out for auroras
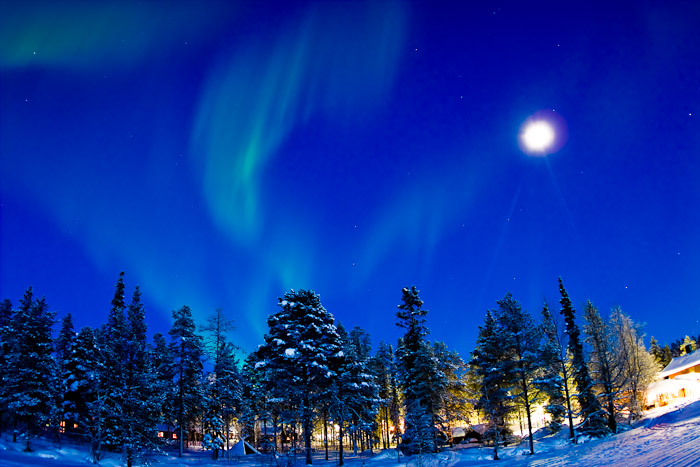
Even though auroras are commonplace in northern Lapland you need to give yourself some time to view them. First of all viewings can be very short. It is therefore required to watch out for lengthy time periods to increase the possibility to view them. My approach is to frequently leave the warm hut and go outside to check weather auroras are visible or not. The relatively slow adaptation of the human eye to darkness requires that you stay outside for several minutes without interference from bright light sources. Renting a hut in a dark environment will therefore increase your chance to see auroras. Bright street lights might decrease the eyes sensitivity dramatically and you already might miss a starting aurora viewing. As the eye has its best sensitivity in black and white �mode�, it is sometimes hard to distinguish between clouds and dim auroras. I experienced that some people don’t trust you when spotting a dark aurora. The best proof in this case is a short exposure with your digital SLR. The photo will show the colour cast of the dim aurora very clearly as the camera sensor is always recording in colour compared to the human eye which switches to black and white viewing in a dark environment. Dim auroras might announce an active time period with very bright lights and it is therefore crucial to spot them on the sky. Even though the adaptation of the human eye to darkness takes quite a while it is very fast destroyed by bright lights. It is therefore recommended not to take any bright flashlights with you to find your way. A flashlight with a dark red filter will allow you to find your way without decreasing the sensitivity of your eyesight. A good alternative is a LED flashlight with red LEDs.
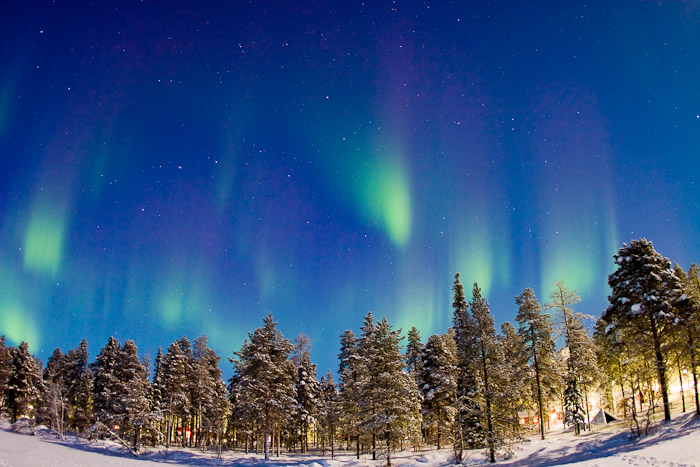
We typically spend two weeks in northern Lapland. Within this time period we see 2 3 auroras in average. The viewings are both, short viewings and hours of aurora gazing. Aurora viewing is influenced by multiple factors. The weather is heavily influencing the chance to see polar lights. At the moment, the solar activity is very low. The solar activity develops in an 11year cycle and is at its minimum this year (2008). In the near future the activity should rise again and there should be more nights with aurora displays.
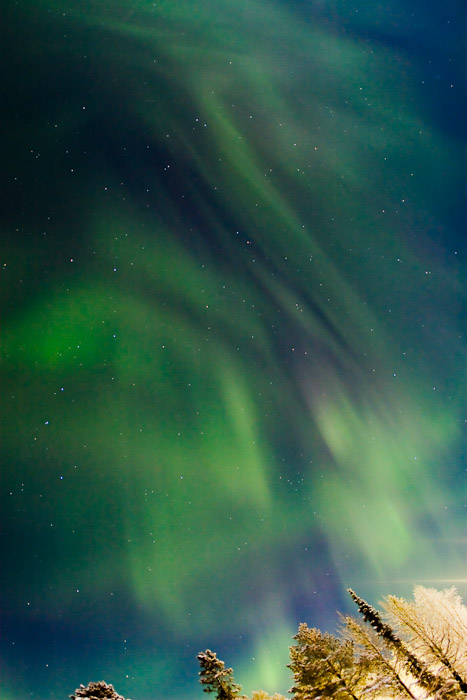
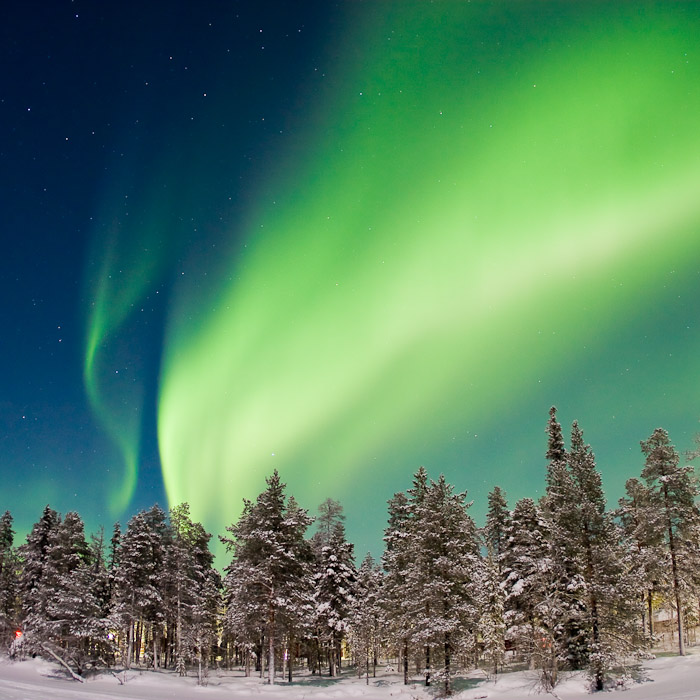
Auroras are seen in many different structures. A very typical form is the vertical curtain. Auroras are generated by electrons and ions emitted by the sun. They travel as the so called solar wind towards the earth and are absorbed from atoms in very high altitudes of the earth's atmosphere at around 80 200km above the earth surface. Depending on the altitude of the absorption process and the atom which is involved in this process, the remittance of the photon occurs in a specific colour wavelength. Higher altitudes generally generate reddish lights while lower altitudes generate greenish lights which are most common. More details on the phenomena of auroras are found on Wikipedia an pictures on the Aurora page.
There are multiple methods that build a base for aurora forecast. One wax is to measure solar activity through satellites with a polar orbit called Polar Orbit Earth Satellites (POES). These measurements can be analysed and mapped into a spherical graph for the northern and southern hemisphere. A web source for these graphs is the Space Weather Prediction Centre (SWPC). A good collection of links for aurora prediction and general aurora information can be found here. The local weather, the availability of a fast internet access and the combining efforts to sum up all the reports into a local prediction (you have to take the local weather into account) makes web forecasting a quite complicate effort. Most of the time it is much easier to just go outside and check frequently for aurora activities, even though it is sometimes hard to get out of the warm and cosy hut into the dark, cold winter night.
Lenses and Exposure
Auroras expose over a wide field in the sky requiring wide angle lenses to fully capture their forms. If you are shooting with one of the widespread APS-C sensors your super wide-angle of 17mm will turn into a moderate 28mm for a full frame sensor. I therefore use a fish-eye lens with the additional plus of having a high opening of 1:2.8. Compared to my wide-angle zoom which is a 17-40mm f4.0 zoom, I gain 1 stop of aperture. As auras are fast moving objects in the sky a one stop increase in aperture and the therefore decreased exposure time is a huge benefit. For the same amount of light you need to expose half the time if your lens is one stop faster. Typical exposure times for auroras are 5 .20 seconds at 400 800 ASA depending on how bright the auras are and how fast they move. The faster the auroras move, the lesser the exposure on the sensor surface. The celestial background moves too and it is therefore important to keep exposure times at a level where the stars will render sharply. Slightly unsharpen star trail are irritating in a picture. A fish-eye lens with 180� opening angle for a full frame sensor will allow to expose for 20 seconds and still render the stars clearly (at least on below 10Mpixel sensor). More information about proper exposure times without generating star trails are found in my article �no star trails�. No matter how short your exposure will be, the chance that the picture rendered on your sensor will be equivalent to what you saw is small. The visual impact of fast moving auroras is very difficult to catch with photography. Nevertheless, the pictures of a bright aurora viewing are impressive on their own. Even though it might be difficult to get an idea of how the picture will look like when photographing a aurora viewing, digital technology with its in-camera preview capabilities make the whole process much more straight forward and you can now easily preview in the field what you just photographed.
The exposure time, the white point setting (which is not that important when shooting RAW as it can be altered when converting the file) and the auto focus will have to be set to manual mode. All automatic features of your camera become obsolete when shooting auroras. The automatic white point setting might give you a good starting point however. Shooting in RAW is (at least in my opinion) an absolute must.
Tripod
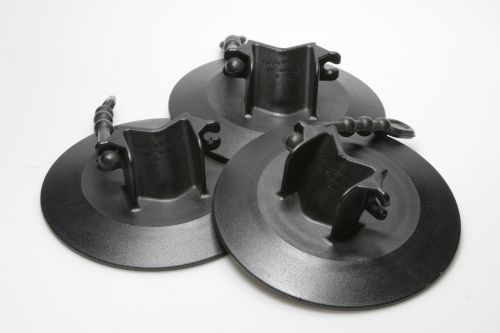
The camera needs to be mounted onto a stable tripod. You better opt for a sturdy and reliable platform rather then a light and flexing solution. My all purpose tripod is the widespread Gitzo G1340 which is a traditional aluminium 3 section tripod from the MK2 family without middle column. The latter is destabilising your mounting and should only be used when extra height is required and not otherwise available. The 1340 however gives you enough clearance and extra height is mostly not required. Lighter versions of this tripod feature the much lighter carbon fibre legs but with a much higher price tag. I use a Really Right Stuff BH-55 Monoball, which is very heavy ball with extraordinary finishing. All the controls can easily be operated with gloves which is mandatory in the Finnish winter. However, the main pre-adjustments should already be carried out in the warmth of the cabin. Snow pads which are mounted to the ends of the tripod legs will give you additional stability when using the tripod in soft snow. They will hinder the tripod to sink too deep into the soft snow surface making it unstable and unsecure to use during long exposure times. The problem arises as a tripod which sinks into a soft snow cover will no longer stand on the legs ends but will be balanced on the inner side of the tripod leg which is not a stable position.
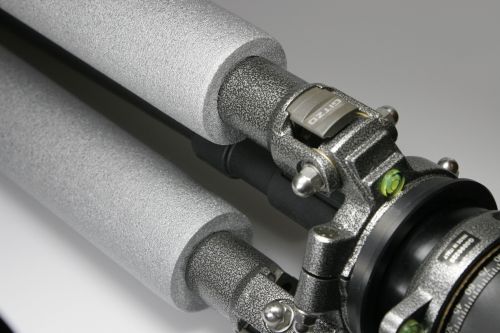
A further help using the tripod during the cold winter time is to insulate the upper leg segment with pipe insulation material. This will not only help to make handling of the tripod more comfortable for not being cold anymore but the soft material will make carrying the tripod over long distances more comfortable. You’ll find dedicated products for tripod segments but usually common insulation material used for water pipes will do the job. The inner diameter will have to be equal to the outer diameter of the upper segment of your tripod legs. On my tripod the insulation pipes did fit that good that no extra gluing was required to keep the pipes on place. I demounted the lower segments of the leg to mount the insulation pipes. Some soap will help to pull the insulation pipes upon the trpod legs.
You’ll find more information about tripods and tripod heads in the dedicated article Tripod.
Remote Control
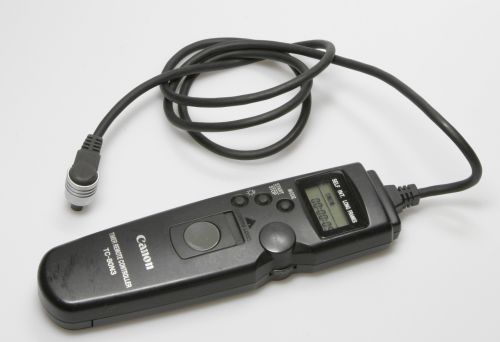
In the beginning I used an electrical cable release. The cable was a little bit cumbersome to handle as it required to be disconnected every time I had to carry the tripod to a new location or risking the cable release to be stuck in tree or similar. In addition to that, the cable release got very sturdy with low temperatures and I feared it would break during long stays outside in the winter night. I therefore prefer to use the timer setting on my camera combined with an advanced mirror lift up, which decreases the timer down to 2 seconds until exposure. If you are dealing with exposure times around 20seconds the mirror lift up would possibly not be required. Anyhow: Working with the timer is a much nicer way to work compared to the electrical cable release.
The only situation where a cable release is used is when combining it with a programmable timer. In this scenario the timer will automatically release the exposure without user interaction. A series of exposure can be exposed. I sometimes use this setup to record aurora movement on the sky. I use the Canon TC-80N3 timer which allows you to set exposure times as well as interval times. Setting the camera to bulb you can dial in the exposure time into the timer making exposure times above 30second possible which cannot be set directly to the camera (at least not at mine).
To reduce sensor noise I often use the in-camera dark frame reduction. In this mode, the camera will record automatically a dark frame after each picture and automatically subtracts it from the recorded picture. The drawback of this approach is the increased waiting period between exposures which can be frustrating when recording fast moving auroras. It is also possible to substract darkframes after the shoot. In this case you need to record one or better multiple dark frames during the shoot and later substract them in an external program. One problem with this approach is, that I do not know of any program that allows you to substract this darkframe directly from the RAW file. If you choose the in-camera processing you will end up with a darkframe that already includes the substracted darkframe. My newer DSLR, the Canon 5D MK2 allows the camera to decide whether a dark frame is required or not. In addition to that, the 5D MK2 is able to store the dark frame and can use it for up to 5 subsequent exposures, i.e. it will wait with the dark frame reduction until the fifth shot is taken; nice!
What else?
If you are shooting over a longer period of time in the outdoors the whole equipment will cool down very rapidly. This is accelerated if your camera is mounted on an aluminium tripod standing in the snow. If you decide to go inside for a break to warm up you cannot simply take the camera with you. The cold equipment would immediately build up condensing water when carried into the warm air of the cabin. It is therefore a good idea to always carry a plastic bag which can be securely closed. Put the camera into that bag before you enter the cabin. I normally carry a water tight bag as used for kayaking. They are much more robust than a standard plastic bag and can easily be closed and reopened. Leaving the camera and the lenses in the bag it normally takes up to 2 hours before I can take out the equipment without the build up of condensing water. Another alternative is to simply leave the camera outside during the break.
Low temperatures will also be a problem for some parts of your equipment. My older Microdrive for example will freeze below -15�C and will not operate anymore. With today’s CF cards this is not an issue anymore. I usually use Extreme III Flash Cards and never had any issue with them on low temperatures. The camera battery itself will also have a reduced capacity in low temperature surroundings. The capacity of a lithium Ion battery will approximately loose half its capacity at 0�C. The older the battery, the lesser the capacity. It is therefore recommended to always carry a secondary battery inside your cloths and have it ready to replace the battery used inside the camera. For even longer shoots an external power supply might be the better solution. I have written a dedicated article on how to build your own external power supply.
If you are shooting over longer periods outside in the daytime in a cold environment it is recommended to always stow away your camera into a camera bag. If the latter is carried like a rucksack close to the body the inside temperature will always be well above the outside temperature and will therefore increase battery lifetime. I normally use a Slingbag which allows to take out the equipment without taking off the bag and still have all the comforts of a rucksack. More on bags will be found in my article camera bags.
Resources
Experiences Aurora 2008
Experiences of Aurora Photography in February 2008 in Finish Saariselka.
The Tripod
Wealth of information around one of the most importent accessories: The tripod
Externe Power Supply for SLRs
Cold sourroundings are very demanding regarding battery power consumption. An external power source will
solve the problem. Building one on your own will be very cost effective and more flexibly by using
either an external battery or an AC adapter.
Geotagging
For those who want to know where all the photos have been taken.
The Aurora Page
Lots of information around auroras.