Geotagging
Introduction
Geotagging allows the user to add geographical data to digital photographs. The geographical positioning where the picture was recorded is written into the EXIF file of the picture. The EXIF also contains all the other technical data of your photograph such as exposure value, aperture, ISO setting and so on. The coordinates are either recorded using a GPS (Global Positioning System) receiver or using an electronic map such as Google maps later on your PC. This article describes the first approach using a GPS receiver during the capture shoot.


The GPS Receiver Unit
GPS receivers are widespread these days (early 2008). A GPS receiver is not required for geotagging as mentioned above. The receiver however will make geotagging a simple and less time consuming act. Geotagging using a GPS receiver can be a largely automated process. The tracking function of the GPS receiver is used. In this mode, the GPS receiver saves log data using an algorithm specified by the user. The data is stored on a regular basis. More details on that later in this text. Beneath the location, the exact time is saved. The time is required to later synchronise the track data with your camera files. Therefore, the clock in the camera needs to be adjusted to the GPS internal clock. My camera allows only setting the hour and minute values. The value for the seconds can not be adjusted. It is therefore easiest to set the time for the next minute and press enter as soon as the GPS time shifts to the next minute. By pressing enter the camera time is set and the clock starts to run. I was able to bring the camera clock and the GPS clock within 3 seconds, which is close enough for this application. To check how the two clocks are aligned to each other it is easiest to take a picture of the GPS showing its internal time and then compare this with the logged capture time in the EXIF data of the camera file. The clock of the GPS system is a very accurate clock synchronised by atomic clocks built into the satellites of the NAVSTAR fleet which send out the signals received by the GPS receiver. The exact time is required for reliable operation of the GPS system.

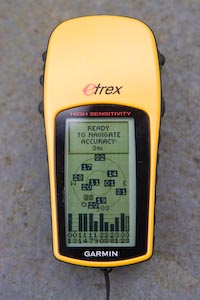
The use of a GPS receiver with a display is not required for Geotagging. Some Bluetooth or USB receivers could also be used. Some of them are specially built to record track data. Their LEDs show the receiver condition and battery life. However, if you like to have more control of what the receiver is doing and how the data is recorded, a unit with display gives you much more control. The most important feature of a GPS receiver is its receiver chip. The newest generation of chips are much more sensitive than older generations and allow GPS reception even in heavily blocked areas such as dense forests or narrow street canyons. Either SIRF receivers or receivers from Garmin with an H indicator show that high sensitive chipsets are used inside the device. The eTrex H is the simplest device from Gamin featuring a high sensitivity chipset and a simple display. I use this device to record tracking data used for Geotagging. Receivers used for In-Car navigation cannot be used for Geotagging as they do not record any track data.
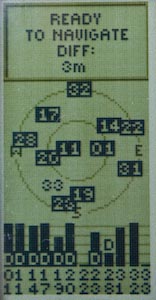
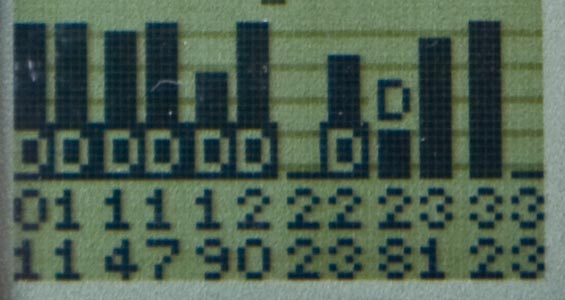
Garmin receivers use a common display to show the status. The upper part of the display shows a status line. Below that, the positions of the satellites on the sky are displayed. The bottom line shows the reception bars with the satellite numbers of all satellites being received at the very moment. The number is the PNR, the Pseudo Random Number used by NAVSTAR (Navigation System for Timing and Ranging). A whole fleet of NAVSTAR satellites are used to deliver GPS signals to their respective receivers. As long as the reception bar is grey, the satellite data is received but cannot be used at the moment for navigational purposes. As soon as the bar turns black, the data is used for positioning. If the Satellite Based Augmentation System (SBAS) is enabled in the receiver (normally found under WAAS for Wide Area Augmentation System) differential data for the different satellites can be used. A D in the status bar will show up as soon as differential data is available for the different satellites. As soon as the receiver is ready to navigate, i.e. as soon as it found its position through proper GPS signal reception, the receiver accuracy is displayed in the status line, e.g. : Ready to navigate: x meters. The distance given for the accuracy is the radius for a probability of 50%. E.g. if the accuracy is 3m, you are with 50% probability within circle with a diameter of 6m. Doubling this distance will increase the probability to 95%. 2.5 times the distance will give you an 98.5% probability. E.g. if 4m are shown you are within a circle of 10 radius or 20 diameter with a probability of 98.5%. My receiver shows an accuracy of 4m most of the time.
At the moment, there are 32 NAVSTAR satellites active in the system, i.e. the satellites PNR go from 1-32. Satellite numbers larger that 32 are used for satellites sending out differential data, i.e. SBAS satellites. These satellites do not send any data used for navigation purely but only differential, i.e. correction data for the GPS receiver. As explained above, you need to enable SBAS with the WAAS feature to receive differential data at all. In Europe, satellite number 33 and 44 are used for the SBAS function. Do you receive data from satellite number 35 while being in Europe you should deactivate WAAS as the data send out from this satellite is only valid for Northern America.
Additional information about the status of the satellites can be found on the NGA (National Geospatial-Intelligence Agency) GPS site. A detailed description of the GPS system is found on the pages of kowoma.
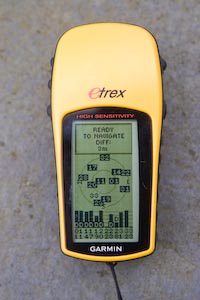
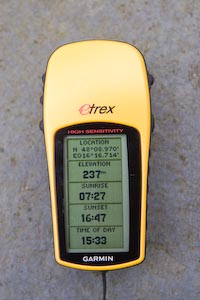
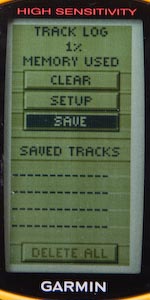
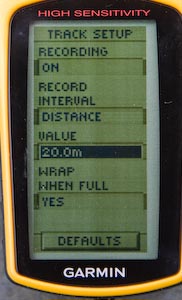
As most of the Garmin GPS receivers the eTrex H saves up to 10�000 track points. In the setup menu you define how often these points are recorded. There are three different possibilities. Either you define the recording by time, e.g. every minute, or you define recording by distance, e.g. every 100m, or you set the recording algorithm to automatic mode. I couldn't find any detailed description of the algorithm and an answer from Garmin is still pending. The algorithm decides upon direction changes how many recordings are carried out. You can set how detailed this automatic mode shall be. My device gives a selection of 5 levels. I found that the highest level is quite useful for geotagging. If you want to be save, you choose distance. In this mode you’ll at least have a recording point defined by every standard distance you walk. However it might be the case, that in this case the recording time for the picture does not exactly match the time of the track point, for example if you stood still at a certain location for a while and recorded multiple exposures. In such a case, a time based system would be the better choice. However, if you define distance as the policy of how to record you can still tell the synchronisation tool that a specific picture was recorded at the same location as one of the pictures recorded before or after that. My experience is quite good using the standard distance approach even though some pictures need manual manipulation of the geographical reference location.

Reading the Track data from your GPS receiver
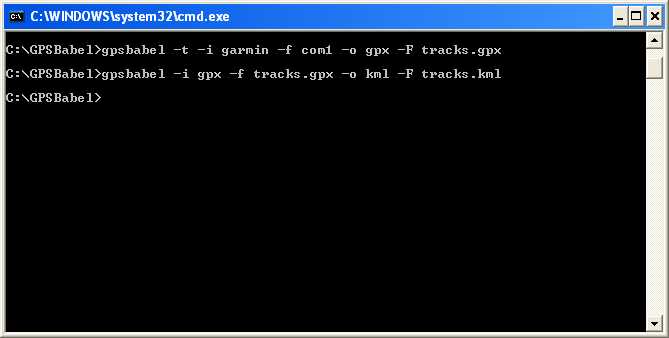
There are multiple possibilities of how to read the track data from your GPS receiver. A universal tool is gpsbabel which can also be used to convert GPS data between different formats. More on converting between different formats is found later in this article. Gpsbabel is a command line program. You may use the windows command line by executing cmd in Start -> Run. In the command line window you have to change into the directory where you installed gpsbabel, for example c:\gpsbabel, by typing cd c:\gpsbabel. Gpsbabel is installed together with a html help file where all the commands are described in detail. It is very helpful to have a look at this file prior to using gpsbabel. To choose the input format you use –I, the input format is defined following the –f label. The output format is defined after –o, the file after –F. If you read from a Garmin receiver at the serial port COM1 you use Garmin as the Input format and Com1 as the input file. The tag –t means that you want to read track data, -r means rout data and –w means that you also want to read waypoints from the receiver.
If you only want to read track data from your GPS receiver connected to Com port 1 the command line types as follows (in this case you read the data into a file of the format gpx which is widely used):
gpsbabel –t –i garmin –f com1 –o gpx –F tracks.gpx
Reading the trackfile from the GPS receiver may take a while depending on the size of the logfile recorded. A full logfile with 10�000 trackpoints may take some minutes to download. It is therefore recommended to start with small logfiles and test the capabilities of gpsbabel. The percentual reading on the Garmin devices regarding the tracklog means memory useage for saving track datas and is linear to the memory used. If the reading shows 30% it means that 30% of the memory, i.e. 3000 trackpoints are recorded in the memory. It is important not to save any trackfileson the Garmin device itself. Saving a trackfile on the Garmin receiver will imidiately clear the whole time base of the tracklog, i.e. only the geographical trackdata is saved, the time stamp is cleared. Therefore saving the trackdata makes it unuseable for later geotagging any images. Reading out of the GPS reciver, a standard gps format shall be used. The above mentioned gpx format is a very good alternative as it allows to save tracks, routes and waypoints in the same file. The gpx format is widely spread and can be read by many programs. It is also fully supported by gpsbabel and may be translated into many other gps formats. Gpx uses the XML language which is easy understandable.
To convert the gpx file into a file that can be read by Google Earth for example, the following command line can be used:
gpsbabel –i gpx –f tracks.gpx –o kml –F tracks.kml
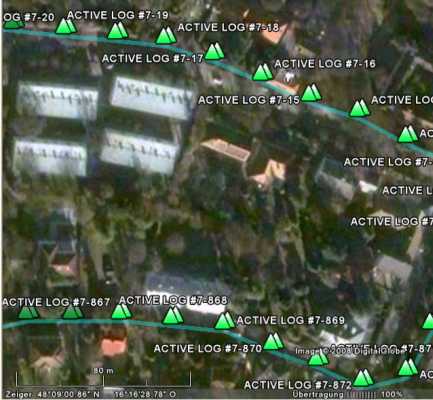
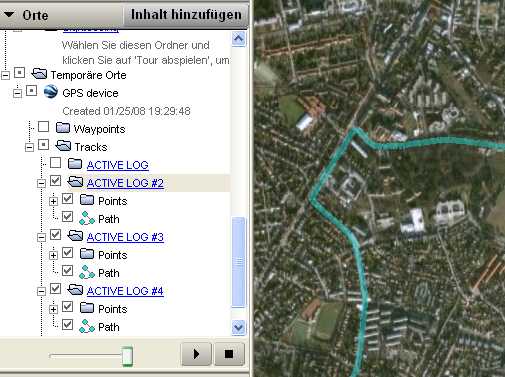
This command line converts a gpx file with the name tracks into a kml file readable by Google Earth with the same name tracks. You simply have to double-click the kml file and Google Earth will show up (if it is installed on your computer) and will show the track data recorded.
If you are not very familiar with using the command line interface you may also use the graphic user interface (GUI) available for gpsbabel shown in the picture below. The same commands as in the command line window can be used in the GUI.
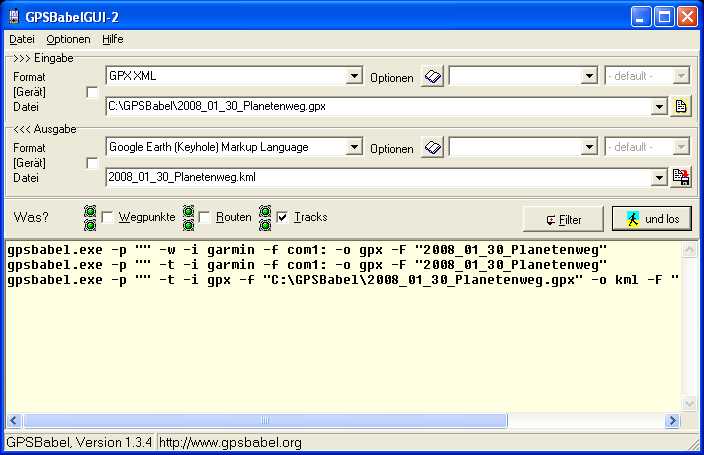
Lets have a look at the format of the gpx file. The trackpoints show up after the elemnet <trk> :
<trk>

<name>ACTIVE LOG</name>

<number>1</number>

<trkseg>

<trkpt lat="48.148913383" lon="16.278669834">

<ele>173.655273</ele>

<time>2008-01-29T14:27:06Z</time>

</trkpt>
The name of the recording is always Active Log and will be numbered if there are multiple logs recorded in the GPS receiver: <active log #2>. After the active log element, the track data starts with the track segment introduced by <trkseg> . Each track point is listed after <trkpnt>. The first listing shows the coordinates, after that the altitude above sea level <ele> and the time stamp <time> are listed. If the track was saved as mentioned above, this <time> attribute is missing.
Synchronising the GPS tracks with the images
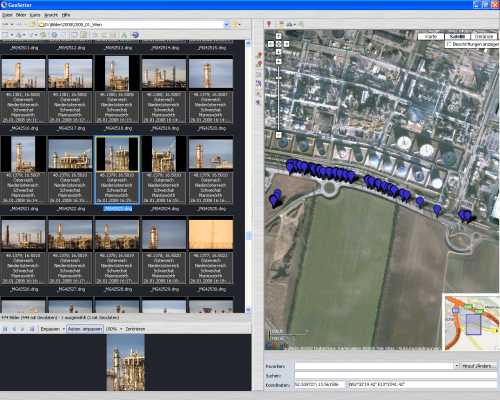
There is a wide variety of programs available that allow track synchronisation with your images, but very few are capable of synchronising RAW files. At the moment I use geosetter of Friedemann Schmidt, which is a freeware tool. It allows a certain set of RAW formats to be synchronised with gpx GPS data tracks. The tool also allows you to use the DNG standard for your RAW files. As almost all RAW formats can be converted into DNG using the Adobe DNG converter, almost all RAW formats can either directly or indirectly (using DNG) be synchronised with your track file.
First of all you have to read the track file from GPS receiver and save it on your computer. After opening Geosetter, open the directory with your photographs and select the ones you would like to geotag. You may select all files with cntrl A. You have to tell geosetter with which track file you would like to synchronise. Alternatively you can select a whole directory with trackingfiles and geosetter will automatically search for the appropriate trackfile by checking the dates and times on your photos and compares them with the data in the trackfiles.
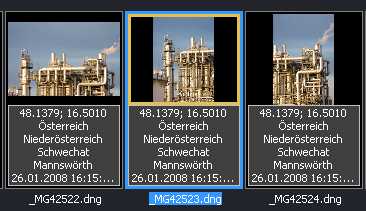
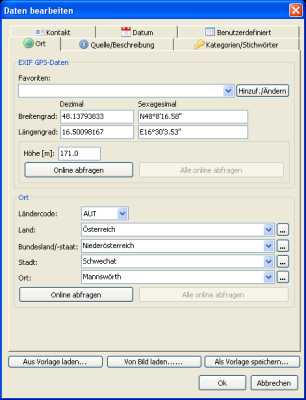
Geosetter is also able to find geographical names for the region selceted, such as city, county and country names. These names can be written directly into the EXIF file of your pictures, which is very useful when scrolling through your library.
