Photobags
Introduction
When I started into photography I bought one of the traditional photo bags available in many stores. I soon found out that this design has its drawbacks. It would be nice to carry the bag more comfortable like a rucksack, not to have to put it down every time I need to withdraw something from it and to have some more room for additional equipment. Some more resistance to weather and rain would also be beneficial. My search for the optimal photo bag started which is not finished after 20 years.
Shoulder bag
The shoulder bag is the traditional photo bag. It allows withdrawing the equipment from the top (top loading) and with an open lid all the equipment is easily accessible. Some modern bags offer the lid to be opened away from the body. This enables easier handling when the bag is not put on the ground and the lid is not always in your way. Today’s design also offers rain covers which are stowed away either in a side compartment of the bag or in its bottom. The main drawback of a shoulder bag is the way you have to carry it: Over your shoulder! This is a very un-ergonomical way to carry a bag and also the reason why small rucksacks are that widespread in all kinds of applications. The way you carry the bag limits its maximum weight to be carried over a certain amount of time and therefore the amount of equipment you can put into it. If the bag is sitting in your studio the whole day over this will not make a big difference as you do not have to carry the loaded bag around for a longer time period. In such a case, a robust suit case like design would probably be the better solution such as aluminium cases for photo equipment.
To overcome this problem the manufacturers offered rucksack adapters for their shoulder bags that allowed carrying the bag as a rucksack. Today this doesn’t really make sense anymore because a wide variety of specially designed photo rucksacks are available on the market. Why would you buy a shoulder bag with rucksack adapter if you are planning to carry a rucksack?
Small shoulder bags make sense. If the bag is lightweight it is OK to carry the bag on one shoulder. I used two shoulder bags for a lengthy period of time which I carried in a crossed arrangement, one over the left shoulder with the bag sitting on my right side and the other bag vice versa. In one bag I carrier my Contax rangefinder equipment, the other bag was for my Hasselblad XPAN with an extra lens. But rangefinder cameras are much lighter than any SLR and therefore ca easily be transported in a shoulder bag.
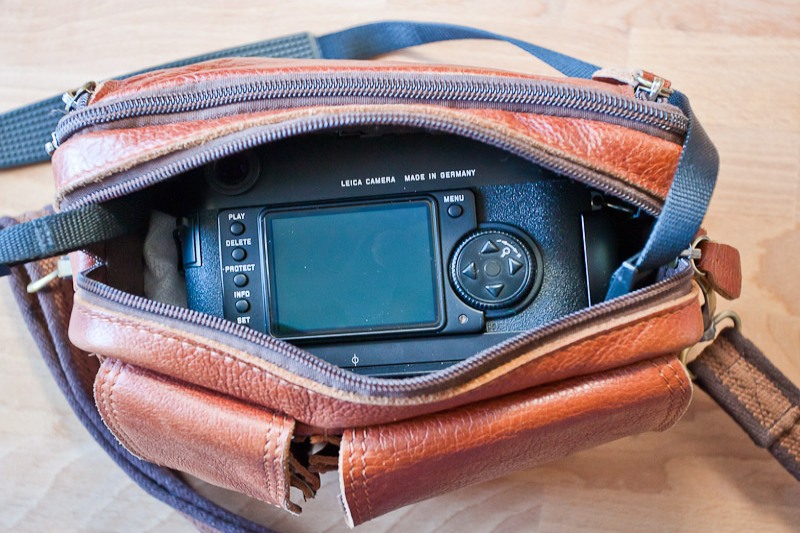
Another shoulder bag which I still use is a traditional leather shoulder bag as shown in the picture below. This bag is OK to be used with one lightweight SLR and two to three lenses. The bag is very unobtrusive and people will not know that I carry around camera equipment. I use it mostly in the town where I feel more comfortable as I have the possibility to hide away my camera equipment when not needed.

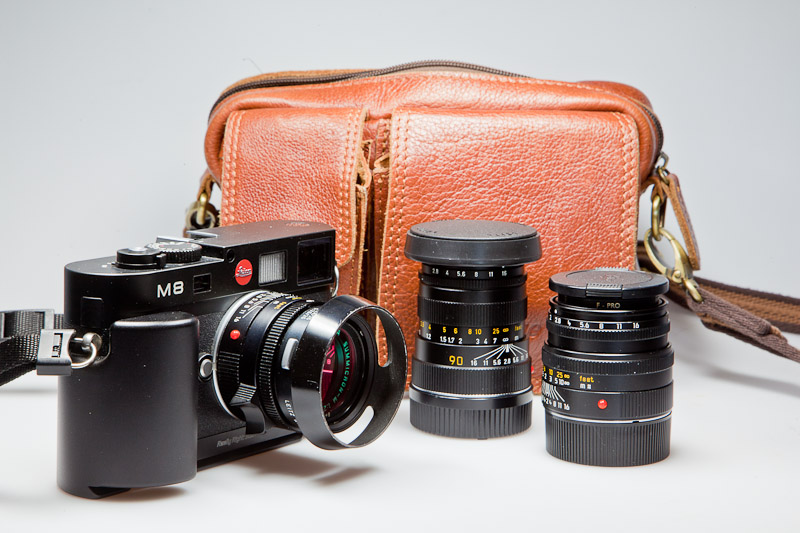
As mentioned above, the shoulder bag is very comfortable for small equipment. I now use a Leica M8 with three lenses and they all fit into a very small leather bag I bought in Hong Kong. It’s not a special photo bag and I simply use small textile bags for the lenses and can then just put everything upon each other without doing any harm to the equipment. This is the most compact bag I have and therefore it’s very tempting to go out taking pictures with just this little bag. And as you have the camera itself around your neck when shooting, there are only two lenses in the bag, a mere 250g per lens. This is something a SLR photographer could just dream of. And taking into account that two lenses have a maximum opening of 2.0 and the other of 2.8, this is just great.
Belt packs
Optimising the comfort to carry a bag around all day quickly initiated shopping for a new bag. The belt pack is a good alternative to the traditional shoulder bag. It is also top loadable and the whole equipment can be accessed opening the top lit, but it is carried around the belt rather than hanging on one shoulder. As for other designs it should be possible to open the lit away from your body. Belt packs only allow comfortable carrying if they are carried close to the body. This limits the thickness of the bag. Two rows of lenses are normally not possible and will decrease the comfort to carry it. I.e. the bag should be longer rather than thicker with less volume away from your body.
These were the main arguments why I selected the relatively simple Lowepro Orion bag. It is relatively small and still gives place for a SLR with two or three lenses. The lenses lay very tightly upon each other, I even packed some of them together without any protection to make use of all the space available. In use, the bag was simply turned around your body to be in front of you and access to the equipment was very straight forward with not much hassle. This bag is of a relatively old design and does not allow the lid to be opened away from the body. When changing lenses the open bag is a comfortable place to leave the lenses until you have your hands free to mount the protection cap on the rear of the lens and the lens cap in the front of it. The bag was that comfortable to carry around that I even used it on the bike. I was a little bit worried that the equipment could be negatively affected by packing it that rigorously into the bag but even after 4000km dirt road in Iceland the hardware still worked without problems. It is probably a better idea to carry the equipment on your body while on a bike rather than having a bag directly attached to the bike itself. The body carried bag will get much less vibrations and shocks as these are absorbed by your body.

There are different models of belt-packs on the market right now. Some of them offer an additional rain cap for wet and rainy conditions. There are also modular bags on the market like the Off Trail 2 shown in the picture above which has one main compartment that holds the camera with one lens attached. Depending on the size of that lens a secondary lens could also be placed underneath the camera in the main compartment. The two side compartments can be attached on your needs for a specific photo shoot. The picture shows one side bag for a big tele lens and another bag for a smaller lens or a flash. The modular design has also one big drawback. The whole assembly does not hold together as tight as a one compartment bag like the Orion 1 and I found that it is therefore less comfortable to carry around. But if you are carrying the camera around with just one lens and a small secondary lens fitting into the main compartment and only require additional lenses from time to time this bag could be a good option for you.
Photo Rucksack
The Rucksack is probably the most comfortable way to carry around your camera equipment. Even if you have a good selection of lenses and more than one camera body these items can easily be stowed away in a medium or big photo rucksack. There are many different models available in all different sizes which will allow you to find the optimal size for your equipment. Some models will come with an additional rain cover while others will be water resistant from the start.
My photo rucksack is mainly used when travelling on an air plane. Being on location I will select the items of my equipment according to the requirements I have for a specific shoot. The reason why I’m no longer using the photo rucksack in the field is the drawbacks in handling a rucksack. First of all you have to take the rucksack from the back and put it on the ground to withdraw any item. This is an uncomfortable and time consuming process. Even if you need to change a lens you need to stop, find a place to put the rucksack to the ground and take the equipment out. I’m quite sure that this process will sometimes hinder you to react quickly to some shooting possibilities and you will miss the shot. Other times you will possibly find it’s too cumbersome to change the lens now and you will try to take the shot with a sub optimal lens. Changing the lens is always a hurdle and each process that increases this hurdle is not a positive influence to a fluid photo session. Another problem with putting the bag on the ground is to find a good place for the bag. Most of the rucksack designs have the lid on the back which means that you have to lay the rucksack on the ground on exactly that side which you will have on your back later on. You therefore have to search for a clean place to put it.


I’d like to add some words about bag sizes and the equipment that could stowed away in it according to manufacturers catalogues. Most of the catalogues will be way too optimistic regarding the amount of lenses and camera bodies that could be placed into a specific bag. They normally take the smallest equipment available for a specific type, e.g. SLR equipment. They also calculate that you take off all lens hoods from your lenses. I use Canon lenses from the L Series and they all have nice lens hoods but they all require a large amount of space. For easy handling, the lens hood should stay attached to the lens all the time. This makes changing lenses much easier. I understand that for certain tele lenses this is not applicable but wide angle and normal zoom lenses should be placed in the bag with mounted lens hood.
Sling Bag
This relatively new bag design combines the advantages of top loading bags with the rucksack. There are already quite a number of bags on the market, mine is the Lowepro Slingshot 200AW. The bag is carried with one strap only on your back. To withdraw any equipment from the bag, you simply shift the bag from your back to the front and take out the equipment from a side opening as shown in the third picture below. With the bag hanging in front of you it is easy to change lenses as you can always stow equipment away and take new equipment out. Both hands are free and it is quite comfortable to work with. The bag offers place for my digital SLR with three lenses ranging from 17mm up to 200mm. Extra space for a flash-gun, CF cards, Batteries and others is also available. The bag offers a rain cover which finds its place at the bottom of the bag. The sling bag works very well but you have to be careful not to load it with too much equipment. As the bag is carried with only one strap, the weight is concentrated on that one carrier. The 200AW is therefore a good compromise, offering enough space for a good range of lenses but still not too much to make the bag too heavy to carry around.


I used this sling bag for quite a while, but I couldn’t put all the equipment into the bag. For example, the 400mm tele lens was too long to stow into the bag in a comfortable way and I had to stretch the whole bag a little bit to fit the lens inside. This is OK as long as you always carry the camera around your neck and use the bag only for the lenses. But it is not very comfortable if you like to stow away all the equipment, for example if it starts to rain.
In addition to that, the zippers on the 200AW are not very well designed and of a low quality. From time to time I couldn’t close the top zipper anymore or it opened while my back was in use: This is a very uncomfortable situation and in the end I couldn’t use the top compartment not at all anymore.
I was therefore looking around for a new sling bag and found the Kata 3N1-30 which is much bigger and of a squarer format compared to the Lowepro AW200. The material is also more robust and with this bag you have additional options. First of all, it’s not only a sling bag but can also be carried as a normal rucksack. The two straps can either be attached like for a rucksack or in a cross over fashion. And they can be used either as a left-turn sling bag or a right-turn sling bag. If the bag is used as a sling bag, the second strap can nicely be stowed away in a compartment inside the back of the bag. As this bag can be used in two sling bag configurations, it features openings at both sides. This is a little bit confusing at the beginning, because you have to remember which side is the actual loading side when the bag is standing on the floor and it is not apparent which opening is on the top when hung around the body.
The side openings are very easy to open by just pulling the whole lid open, which opened the two zippers. The opening is secured by a click mechanism, but I think the design of this is not very good as it cannot be opened with gloves. As the bag comes from Israel, probably nobody was thinking of using it at small temperatures. This is a major flaw. I also don’t like the top compartment. This compartment has a opening towards the top of the bag, which is on the side when used in sling bag configuration. If you open it, everything falls out! I.e. it is simply not useable in sling bag configuration. This is another major design flaw. I sometimes wonder if nobody is testing these bags before they are thrown onto the market. Finally, the inner compartment dividers are not very well secured, they are not fixed at the side walls. But the overall impression of the bag is quite good and I think if these flaws are redesigned, the bag would be very impressive.
The Kata 3N1-30 also offers a rain cap, but as the outer material is very robust I never used it until now. But its still a big bag; compare it with my Leica M8 bag!
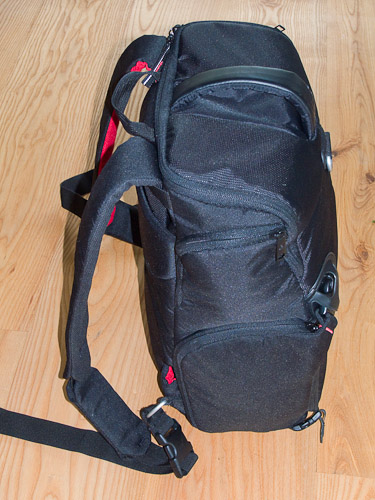
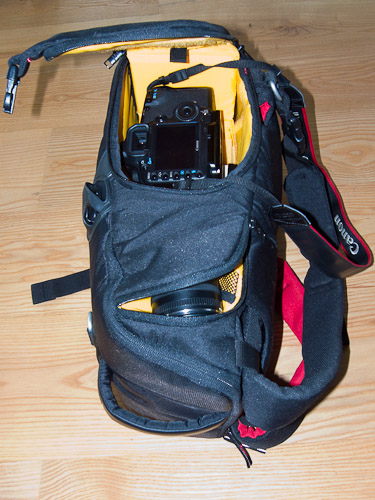
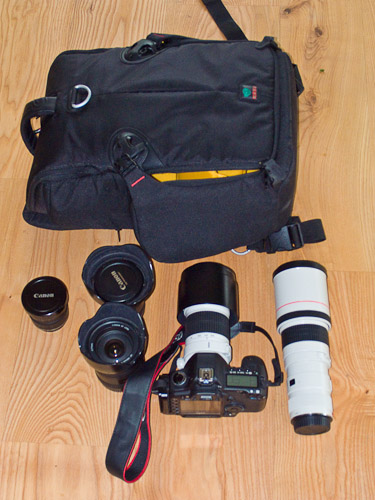
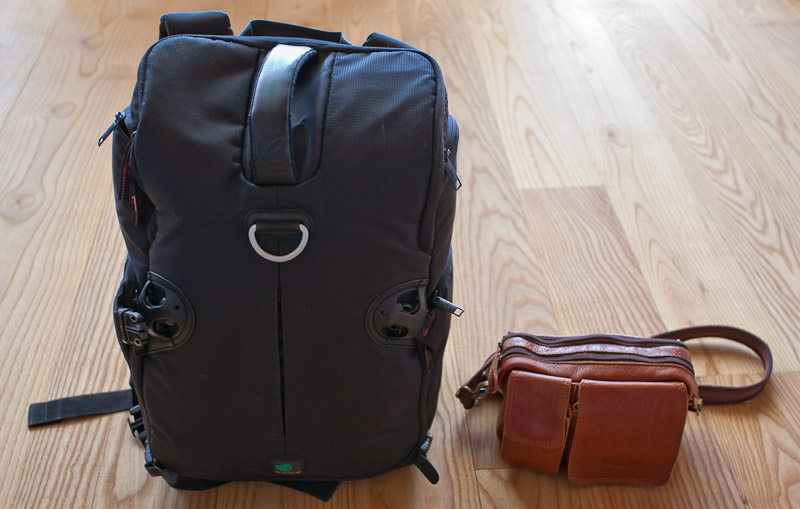
Photo case
If weight and wearing comfort is not an issue, the photo case is an ideal place to store your equipment. Even a good selection of lenses will find place in a photo case and the hard cover will protect the equipment. There are water tight cases available which will also protect the equipment from dust and sand. One manufacturer who is specialized on water tight cases is Peli. As most of the manufacturers they offer flexible adjustable cellular material for the inside of the case. This material can easily be cut according to your requirements. Good cellular material based inlets come in a pre-cut manner, which means that you only need to cut out as many square parts as required to make place for your lens and camera. The picture below shows how I configured it to fit my equipment. Peli also works together with a camera bag manufacturer and you also have the option to buy a bag which fits exactly into the hard case. This allows you to either use the photo bag stand alone or in combination with the Peli hard plastic case.

Contax once offered a small aluminium case for field usage. Even though it was very small and nicely designed, it was still too uncomfortable to take into the field. I therefore didn’t use it at all and stowed the whole Contax equipment into a very compact shoulder bag, as mentioned above.
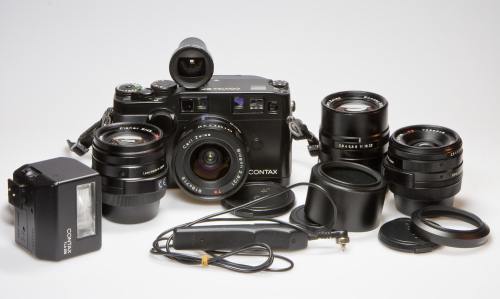
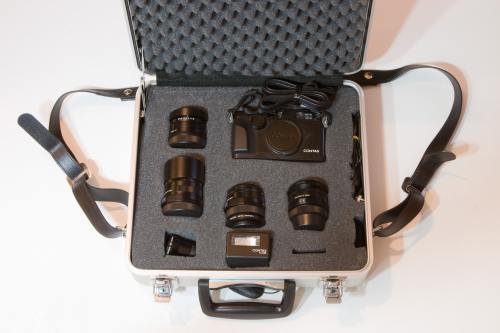
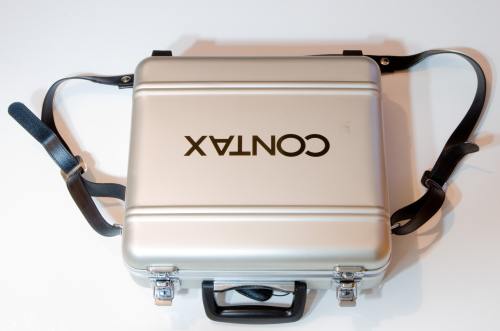
Photo Jacket
The photo jacket is probably the most exotic photo bag. It is definitely not appropriate for an inconspicuous photo shoot. But on a safari for example it is one of the best photo bags available. My photo jacket even allows me carrying my 400mm tele lens with all the other lenses. As all the equipment is carried relatively close to the body you will not really feel the weight and it is one of the most comfortable ways to carry a good selection of lenses with you. In addition to that all the equipment will be very fast at hand and the extra bags allows stowing away extra batteries, CF cards and reflectors for macro work. I used my photo jacket extensively on the safaris in South Africa but back in Europe I’m using it very seldom.