Aperture
Introduction
You'd think there wouldn't be much to write about the aperture. But the topic is much more productive than you think and there are some interesting details to report. So there are always questions how to calculate the aperture difference between two cryptically given aperture numbers or how exactly an aperture row is composed or what influence the number of aperture lamellas has on a photo. I will also discuss the hyperfocal distance and the depth of field.
Aperture definition
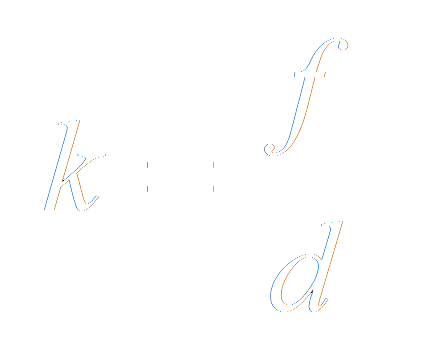
The aperture allows you to regulate the flow of light through a lens. In principle, the aperture is a variable hole through which the light in the lens is directed. The maximum aperture of the lens is also called the maximum f-stop. The f-stop number is the ratio between the focal length of the lens and the lens diameter (diameter of the front lens). The larger the diameter with the same focal length, the smaller the f-number. The f-number is abbreviated with the letter k, the focal length with f and the diameter of the front lens with d:
The reciprocal of this formula is referred to as the aperture ratio, i.e.
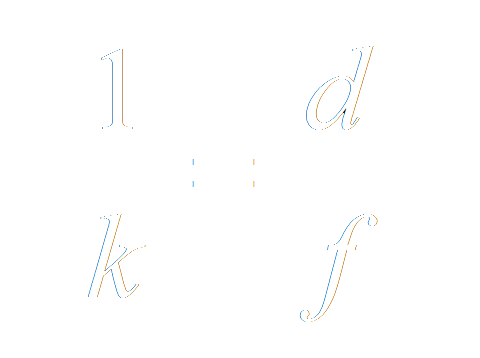
A lens with a focal length of 50mm (in the 35mm format this corresponds approximately to the format diagonal and thus this focal length is called normal focal length) and an aperture of 25mm thus has an aperture of f=50mm/25mm=2.0. If one measures this now at a lens one notices quickly that the ratio usually results in different values than the values printed on the lens. This is because d actually refers to the entrance pupil, which does not exactly correspond to the diameter of the front lens. So my Summicron 50mm has a diameter of the front lens of 30mm, so you would calculate for f=50/30=1.66, but the lens has 'only' an aperture of 2.0. With my 35mm the diameter of the front lens measures 25mm, the calculated aperture results in f=35mm/25mm=1.4, also here the real aperture of the lens is 2.0. So you can't rely on the formal, but it gives an approximate reference value anyway.


F-stop steps
Actually, there are infinitely aperture values, but for the sake of clarity there are a few fixed values and lenses are usually designed to match one of these aperture steps. If you use a numerator n, where n corresponds to an ascending sequence of numbers, you can easily calculate whole f-stops with the following formula, if n is an integer and any other sequence, if you dimension n accordingly, e.g. 0.5 steps for half f-stops:

This results in the following aperture rows for full, half and third f-stops:

A full step doubles the opening of the aperture, allowing twice as much light to pass through the aperture. However, the radius is only increased by the factor root(2)=1.4, because the area is square to the radius. The f-number will therefore only increase by a factor of 1.4. But every second f-stop doubles. So you don't have to remember the whole aperture row, it is enough to remember 1.0 and 1.4 as initial values, all other values are calculated by doubling. The second-next values are again calculated by doubling. This was obviously done with the original definition of the f-stop row, because you will not find the values 5.7 and 23 on your lens.
If you multiply the next value with full f-stops simply by multiplying the previous value with root(2) or 2^(1/2), you have to use the multiplier 2^(1/4)=1.19 for half f-stops or the multiplier 2^(1/6)=1.12 for 1/3 f-stops.
Of course the manufacturers are not completely in agreement whether they should introduce 1/3 steps or ½ steps. With electronic apertures today, you can usually define this yourself, whether you prefer ½ or 1/3 steps. Lenses with a mechanical aperture ring naturally leave no choice. For Leica, for example, ½ steps are used, for Zeiss lenses 1/3 steps are used; bothe lenses are for the Leica M system. I myself prefer ½ steps because this is accurate enough for me and I don't have to remember so many numbers. In addition, I can click twice on the time wheel and twice on the aperture ring and have the same exposure again. But everyone will have his own preference.

Some manufacturers don't seem to care at all about aperture rows. So my Ricoh GX200 doesn't only use 1/3 steps, but also other absolute f-stops depending on which focal length is set. Of course this is absolutely confusing and you can't do anything with all these values. Obviously at each zoom level the maximum aperture was simply calculated and from there a row of apertures was calculated.

But how do you calculate the aperture difference e.g. between (at 28mm) 4.3 and 5.4?
Difference between two f-stops
As already mentioned, the aperture steps are calculated with the following formula:
We now dissolve them after n and receive:

Where lb is the binary logarithm, i.e. the logarithm with the base two.
And since we are interested in the difference between two values n1 and n2, we only have to form the difference:

The above example with k1=4.3 and k2=5.4 shows a difference of 0.66, i.e. 2/3 f-stops. If you can't find an lb on your calculator just take the 10 logarithm (log) and divide by log(2).
Fortunately, you don't have to do this calculation every time you're in the field. Thanks to the standardized aperture row, this is much easier (once you have memorized the values).
Depth of field and hyperfocal distance
The depth of field increases with higher f-stop numbers. But how does depth of field define itself? Actually, only the point on which the focus has been placed is sharp, i.e. the plane parallel to the film or sensor plane that goes through this point (I'll skip Scheinpflug for now). But as the eye allows a certain blur in order to declare an object as still sharp, points in front of or behind the plane are also regarded as sharp. These dots are displayed as small circles of unsharpness. But how big may such an unsharp circle be at all? Since the human eye has an approximate angular resolution of 2 angular minutes and the field of view is 50 degrees of angle, these 2 angular minutes are about the 1500th of the field of view. If one now assumes that one places a photo just in such a way that the diagonal fills the facial field, one has to generate a resolution of 1500 points on the diagonal. And as one has enlarged the photo from a sensor image or a film, it must also have the same resolution. Thus, the criterion is 1500th of the sensor or film diagonals. This results in the known 30um for the 35mm.
As this unsharpness circle refers to the format diagonal, it also gets smaller with decreasing format diagonal, e.g. with an APS-C sensor with a crop factor of 1.6 it gets smaller by a factor of 1.6, thus instead of 30um (exactly 29um) only 18um.
What is interesting is the distance at which the depth of field extends to infinity. If this value is set, everything from half the set distance to infinity is in focus. The hyperfocal distance is calculated as follows:
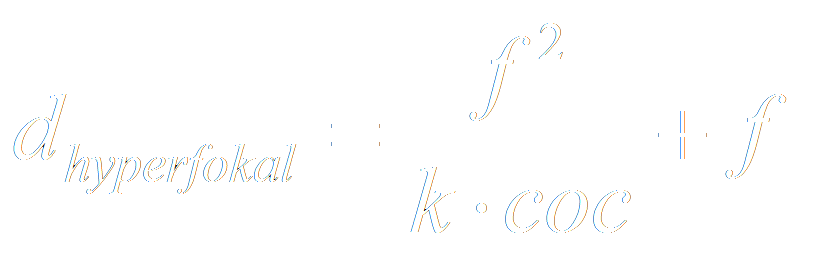
Where f is the focal length, k the aperture number and coc the circle of confusion. If you set f=50mm, k=8 and the coc to 30um you get a distance of 10.5m. If you set this distance on the lens, everything from 5.25m to infinitely sharp.
The table below shows the depth of field as well as the absolute depth of field limits for the 35mm format and a 50mm lens at a focus setting of one meter:

If one is in the lucky position and the used lens still has markings for the depth of field, one can of course quite simply adjust any depth of field range or quite simply adjust the hyperfocal distance by setting the infinite sign to the marking for the depth of field at the respective aperture.

However, it is important to note for which sensor the depth of field markings have been applied to the lens. Since full-frame lenses can also be mounted on cameras with an APS-C or APS-H sensor, it must be noted that the depth of field scale was calculated for the full-frame lens. Therefore, with an APS-H sensor, one has to stop down just one f-stop more, with an APS-C sensor, there are just two f-stops more. This is illustrated in the table below:

It has to be pointed out that a 50mm lens at a smaller sensor shows a smaller image angle. Therefore, a 50mm lens on an APS-C sensor is equivalent to an 80mm lens on a 35mm sensor regarding the image angle. This is described in more detail in the article sensor.
If there are no such markings on the lens, the easiest thing to do is to make an adjustment wheel yourself. There is the software dofmaster, which allows the creation of such a depth of field calculator in the simplest way.
An example for such a depth finder is shown below:

Influence on imaging performance
The aperture has a significant influence on the imaging performance of a lens. The better a lens is corrected, the less you will notice this effect and the more useful a lens is when the aperture is fully open. Virtually all aberrations, however, benefit from a slight aperture reduction. This can already be seen from the manufacturer's data sheets. The MTF (Modular Transfer Function), for example shows a better contrast reproduction of the lens with geater f-stop numbers. The MTF for the Leica Summicron 35mm ASPH is shown below. The increase in contrast performance at aperture 5.6 relative to aperture 2.0 is clearly visible. The curve pairs correspond to 5, 10, 20 and 40 line pairs per mm (lp/mm), the dashed curve stands for sagittal structures, the solid curve for tangential structures; copyright Leica.

This means that a lens is usually less sharp than in the center.
As an example, I would like to show the vignetting, which decreases significantly when the lens is dimmed. The picture was taken with a Canon EF24-105mmf4.0L-ISM with an aperture of 4.0 and an aperture of 8.0, so two apertures were stopped down.


A lesser known effect is that excessive high f-stop numbers reduces the sharpness of the image, as scattering effects occur at the aperture lamellas. This also means that smaller sensors are more affected than larger sensors, simply because the unsharp circle that can still be tolerated is larger with larger sensors. This has already been discussed in the article sensor size. I would just like to show the effect of a lens with a very well corrected Leica Simmicron 35mmf2.0 ASPH, i.e. a lens with aspherical correction. The cutouts were taken from near the edge of the image. The image series includes images at f-stops 2.0, 4.0, 8.0 and 16.0, i.e. images at a distance of two f-stops each. From f-stop 2.0 to f-stop 4.0, a clear increase in contrast and sharpness is visible, note for example the branches in the foreground or the lawn in the background. This has nothing to do with depth of field (at least for the lawn), with a 35mm lens and an aperture of 2.0 the hyperfocal distance is about 20m, so everything should be sharp from 10m to infinity (with a 30um blur circle). The branches in the foreground are about 25..30m away, the pool about 50m.
At aperture 8.0 the maximum is already reached and at aperture 16.0 a slight deterioration of the image quality is visible again. At f-stop 16.0 the image quality of f-stop 2.0 is almost reached again. That's probably the reason why the lens can't be dimmed any further.


Aperture lamellas
The shape and number of the aperture lamellas has a decisive influence on the reproduction
of
the blurred areas of an image. The way in which blurred areas are depicted is also called the bokeh (from jap.
boke blurred
) of a lens. This is simply because an aperture with fewer lamellas forms a less round
opening compared to an aperture with many lamellas . The blurred areas, however, will reproduce exactly this
shape
and as soon as these areas are no longer represented as round surfaces, they appear less harmonious to the
eye. We
will take a closer look at this below.

First we look at two different 50mm lenses for comparison, a Canon and a Leica normal lens (see picture above). The lens shown below is a Leica Summicron at f-stops 2.0, 8.0 and 16.0. You can see very nicely how the aperture is formed relatively round by the lamellas. The lens has 8 lamellas.


The Canon lens has only 5 blades. As you can see in the pictures below, a small number of aperture lamellas form a less round opening. The three images show the lens at f-stops 1.8, 8.0 and 22.0; the Canon lens can therefore be dimmed one f-stop more than the Leica lens.


The influence on the image reproduction is shown in the following figures:


