Inkjet Printing
Introduction
The inkjet printer has established itself among home photo printers. Those who want to capture photos on paper today either have the photos printed by a photo service, put together a photo book and order it online or use their own inkjet printer. This has de facto replaced the darkroom, as far as it existed at all. But the inkjet printer also needs to be mastered. One can get relatively easily good results without much previous knowledge, but as always the devil lies in the detail. Only if one understands all the different parameters and their influences and also gets the colours under control one will get predictable results in the long run and not only print on good luck.
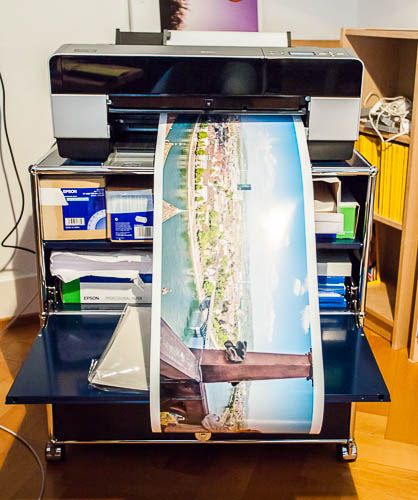
preparation
Before you start you should make some basic settings on your computer. In order to prepare the image for printing, the screen has to be calibrated. I don't want to go into this comprehensive topic in detail, there is enough literature available. Also the printer must be fed with the appropriate profiles. Each combination of paper, printer and ink has its own profile. In order to simplify things at the beginning, it is recommended to use the manufacturer inks and a manufacturer paper with the printer, e.g. an Epson printer with original inks and Epson paper. At the moment there are three major manufacturers of inkjet printers who also offer the corresponding inks and papers with the corresponding profiles: Epson, Canon and HP. Epson probably offers the largest assortment of different papers. The offered profiles are already quiat good and you don't have to create a profile for your own printer. One can still do this in a later step. The same applies to trying out other papers and inks.
printer resolution
Since an inkjet printer cannot spray dots of any color onto the paper, it has to combine the respective color from several color dots. You can imagine a screen that is so fine that the eye sees it as a dot (the whole thing is called dithering). With a 3x3 grid cell you can get e.g. 10 gradations. The eye can recognize about 256 gradations, so a corresponding raster cell would be 16x16 dots in size. Thus, the inkjet printer would have to produce 256 raster dots in order to bring an image dot onto the paper. The resolution of the printer would be accordingly 16 times higher than the resolution that the eye can barely see, so that the individual halftone dots cannot be seen. Assuming a limit of 300ppi (ppi=pixel per inch) for the eye, the printer would have to print with 16x300dpi=4800dpi (dpi=dots per inch). This results in a black and white image, for a color printing one has to print at least 3 colors, namely cyan, magenta and yellow, thus CMY and accordingly three raster cells per pixel. Since one does not get good black tones with the three colours alone, black (K) is still mixed in during printing; this reduces the screen size, as certain colour combinations can now be replaced by the fourth 'colour', black.
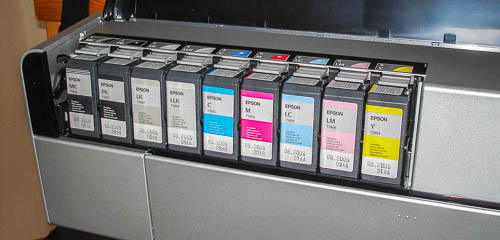
Now you can print the halftones partially on top of each other, because you don't occupy all halftone dots with bright colors. In addition, modern printers can also vary (modulate) their ink dots slightly, which in turn makes the screen size smaller (but at least with some printers this depends on the print resolution). And then today's printers also use diluted variants of a color, which again leads to the fact that one can reduce the screen, since now a light magenta is printed directly without having to produce it from a dark magenta. My printer, an Epson 3800 uses for example for a print up to 8 inks: 3 black inks, Black (K), Light Black (LK) and LightLightBlack (LLK), Cyan (C), LightCyan(LC), Magenta(M), Light Magenta (LM) and Yellow(Y). Like most printers today, it also has two different black inks for matt (mK) and glossy (pK) paper. The difference lies in the fact that the mK ink contains more or larger pigments than the pK ink; in addition, the mK pigments are different or not encapsulated and therefore do not adhere to gloss and silk matt papers, or only inadequately. On the other hand, pK inks on matt paper do not achieve deep black tones. However, only one or the other black ink is used for a print.
The whole thing is even more complicated because the printer does not necessarily offer the same resolution in
vertical (in the direction of the paper flow) and in horizontal direction. For example, my printer uses 720dpi
and
1440dpi vertically. In the horizontal direction the resolution can be set to 720dpi, 1440dpi and 2880dpi. The
printer allows three settings for photo paper:
- Level 3, Fine or Fast: 720dpi x 720dpi
- Level 4, super fine or quality: 1440dpi x 720dpi
- Level 5, SuperPhoto or max. quality: 2880dpi x 1440dpi
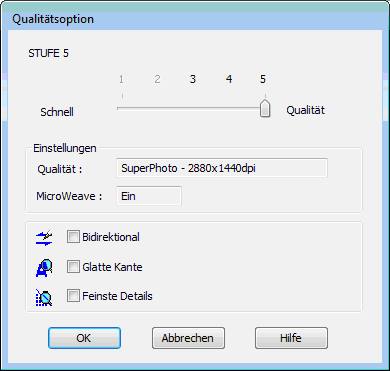
As you can see in the graphic above, you can choose three more selection points in addition to the resolution:
Bidirectional: If this option is activated, the print head prints in both directions of movement, i.e. on the outward and return route. This is twice as fast, but has a negative effect on the quality, as we will see later.
Smooth edges: According to Epson, this option should be activated when printing images with a lower resolution. I leave this option deactivated, as there are dedicated tools for it and we want to print in a sufficiently high resolution anyway.
Finest details: This inconspicuous box influences the resolution with which an image is sent to the printer. If the option is deactivated, the native resolution of the printer is 360ppi, if the option is activated it is 720ppi. This is the image resolution and not the raster resolution of the printer. As we will see, one should send the image to the printer already in the correct resolution, as otherwise the printer driver does a resampling (thus a recalculation of the image resolution) of the data. But Photoshop and Lightroom can do this better, so you should send the native resolution, i.e. with the option 'Finest details' deactivated with 360dpi and otherwise with 720dpi. If, for example, one has a camera with 24MPixel, thus 4000 x 6000 pixels, then one gets a resolution of 4000/20 pixel per cm, thus 200pixel per cm, that is approx. 500dpi for a printout in the format 20cm x 30cm. Should one now sample down to 360dpi or sample up to 720dpi? We will see that later.
bidirectional printing
The bi-directional print setting has a large influence on the print speed. As mentioned above, printing is twice as fast if the print head is also active on the way back to the starting position. Unfortunately the position accuracy on the 'way back' is less accurate than on the 'way out' and therefore the print quality suffers noticeably.
The examples below speak for themselves. One should note, however, that the examples are greatly enlarged, in reality one has to look a little closer to see the differences, but they are clearly visible. It was printed here with the native resolution of the image, in this case 700dpi. All tests were carried out on my standard paper, the Epson Enhanced Matte. With a mat paper, the print resolution is less critical than on a silk mat or glossy paper, and yet the differences are also clearly visible here. Since I rarely print on silk matt or glossy paper, I did these tests on my standard paper. All pictures are scans from a print of the picture below, which was printed A5 and the cutout was scanned with 1200ppi.
However, it has to be said that there are differences in the print quality even under printers of the same type. This might be a reason why you can read in different places on the internet, you wouldn't see any difference between unidirectional and bidirectional printing. So you have to try it out for yourself; with my printer the differences are not huge, but they are still visible.

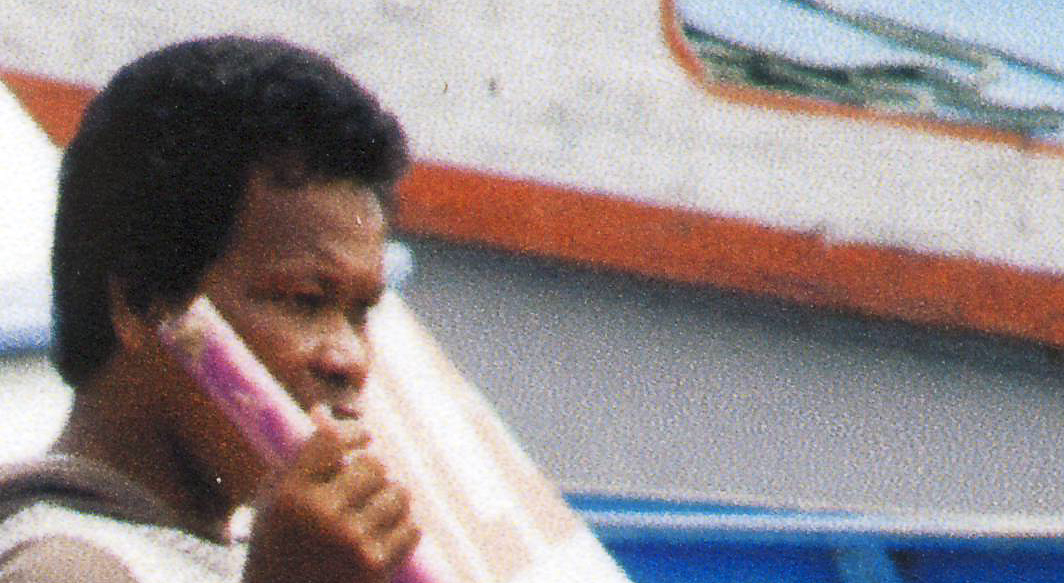
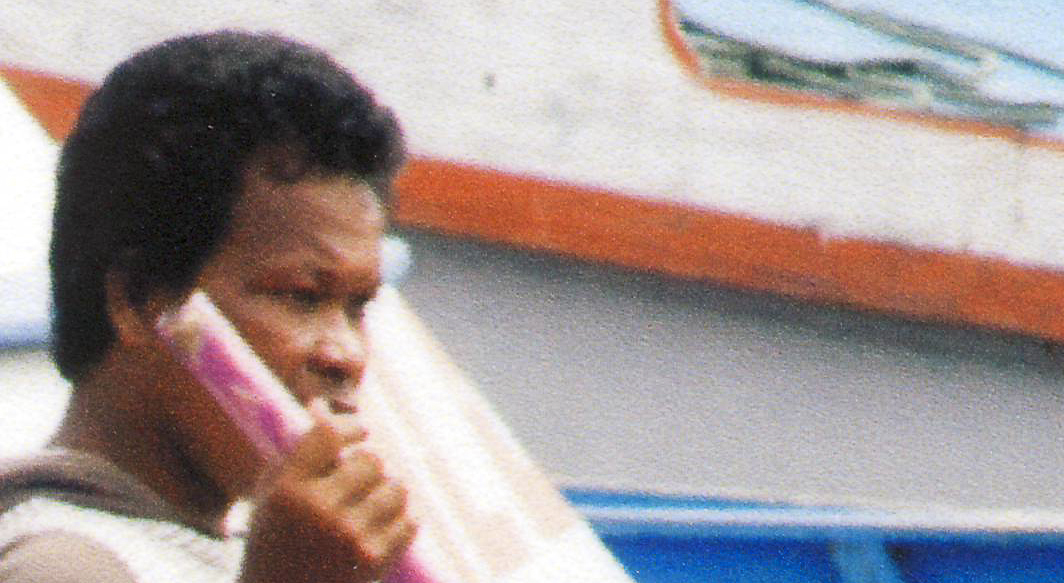

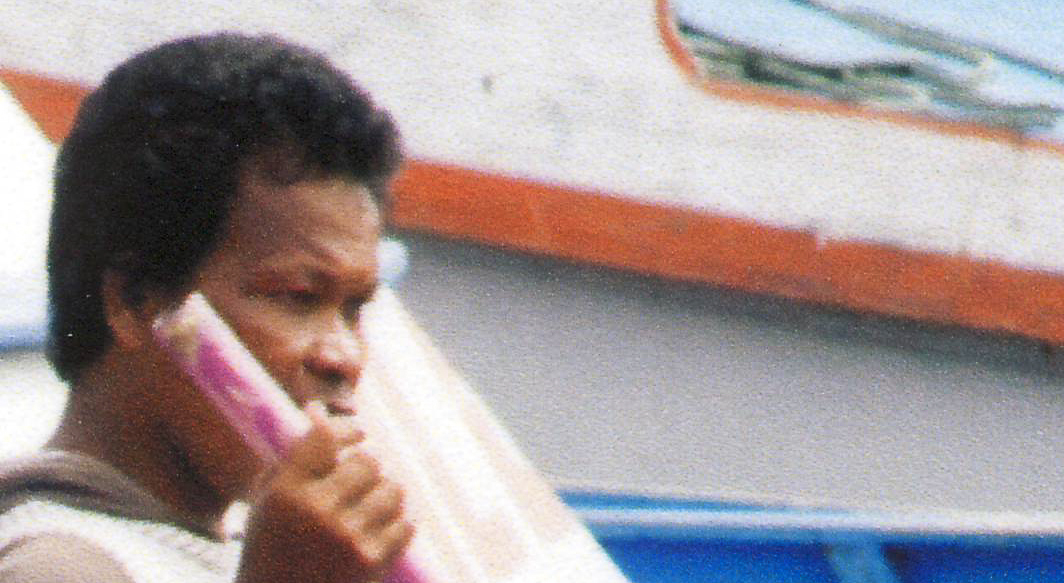
The next question is whether to print at 1440dpi or 2880dpi. Please note that my Epson 3800 modulates ink drops at 1440dpi, i.e. prints in different sizes (according to my information in two different sizes) on paper, but prints unmodulated at 2880dpi, i.e. with ink drops of the same size.
Both resolutions clearly benefit from unidirectional printing. And from the picture examples it is already clear that with 2880dpi a more even screening is achieved, which looks less grainy. In the picture, this is also noticeable in the brighter tones, which appear purer.
native printer resolution
It has already been mentioned above that the native print resolution of an Epson printer is 360ppi (HP and Canon apparently use 300ppi). This is only the case if the option 'Finest details' is deactivated. What does it look like if you feed the printer with a different resolution? One often finds information that 240dpi resolution is completely sufficient for one print. However, the information under which conditions this applies is usually missing (e.g. whether one prints with matt, silk matt or glossy paper).
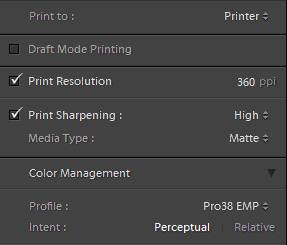
In order to investigate this in more detail, I made three printouts in which Lightroom sent the image sampled with different resolutions to the printer, namely with 240, 360 and 720ppi, each with 1440dpi and 2880dpi print resolution, thus a total of 6 prints. Lightroom uses a very good sampling procedure that is obviously superior to the sampling procedure of the printer driver; one clearly achieves the best possible results by sending exactly the resolution that corresponds to the printer's print pipeline. In this case, I disabled 'Finest Details', so the native print pipeline resolution is 360dpi.
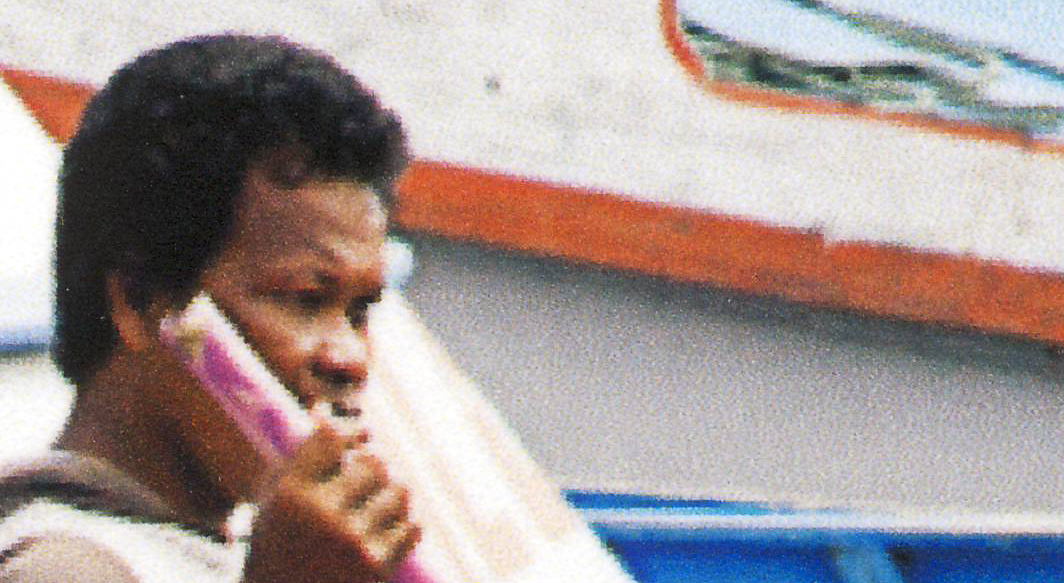

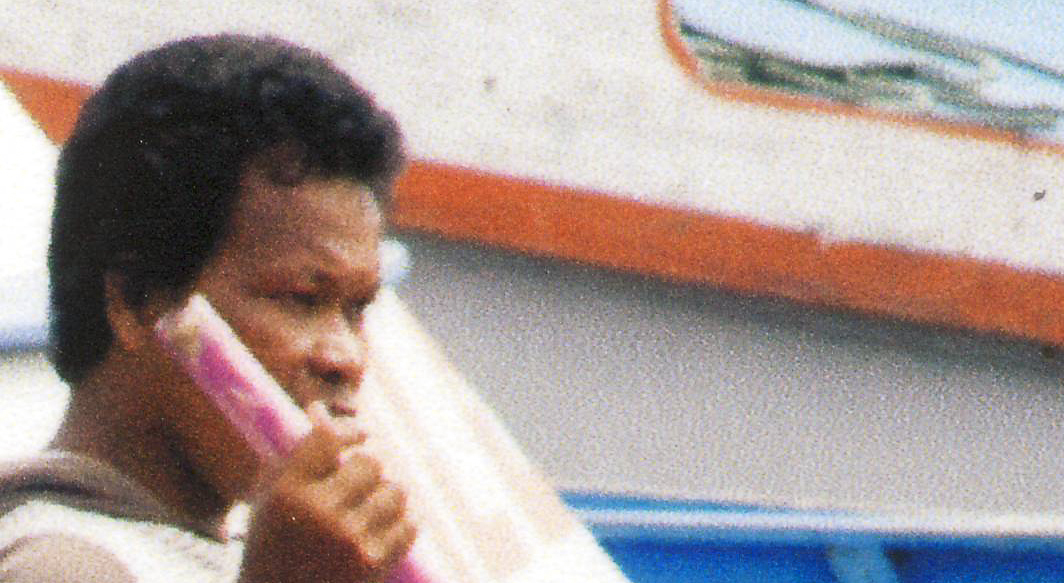
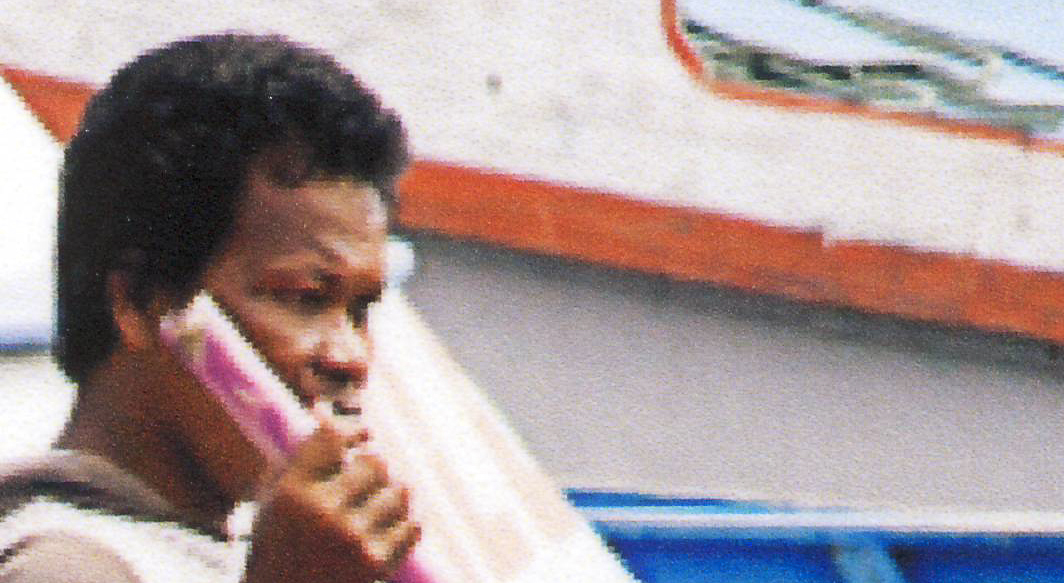
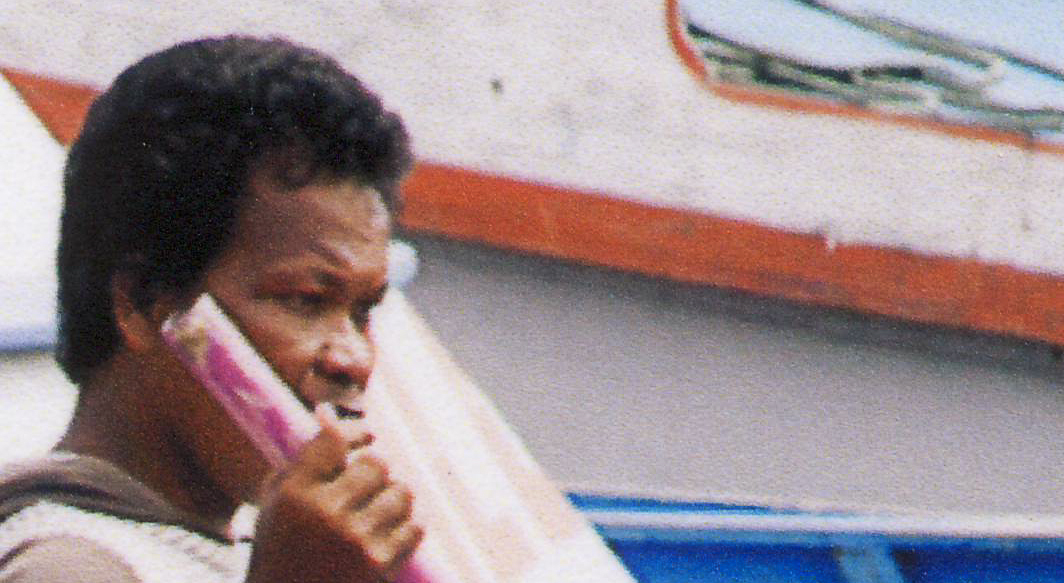
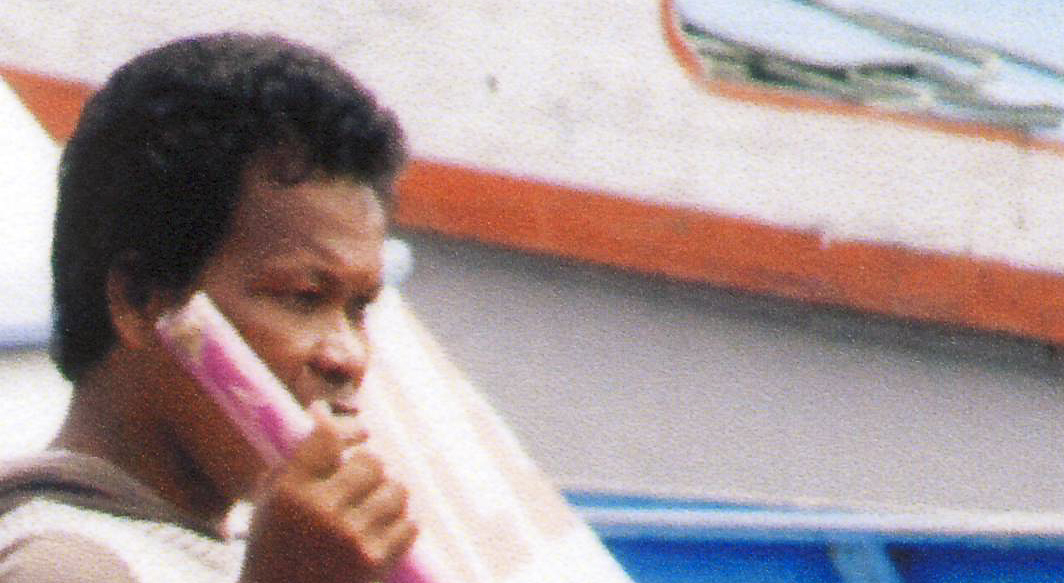
Without the information about the print pipeline one would be surprised that printing at 720ppi produces worse results than printing at 360ppi; but when printing at 720ppi the image is resampled by the printer driver, and the printer driver obviously doesn't do that very well, in any case not as well as Lightroom.
Accordingly, we still test the effects of the sent print resolution with the option 'finest details' activated, thus with a print pipeline with 720dpi.
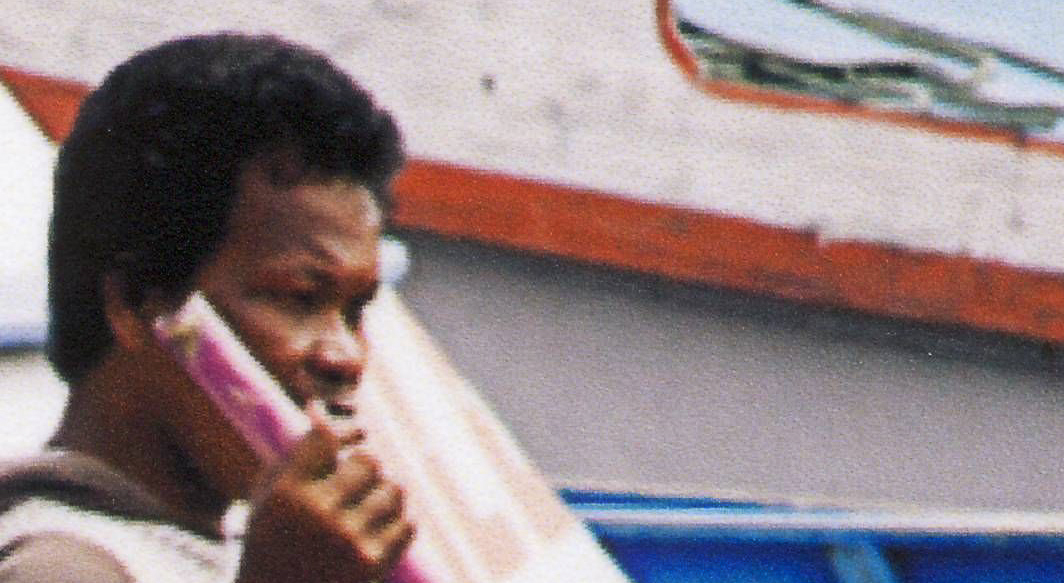
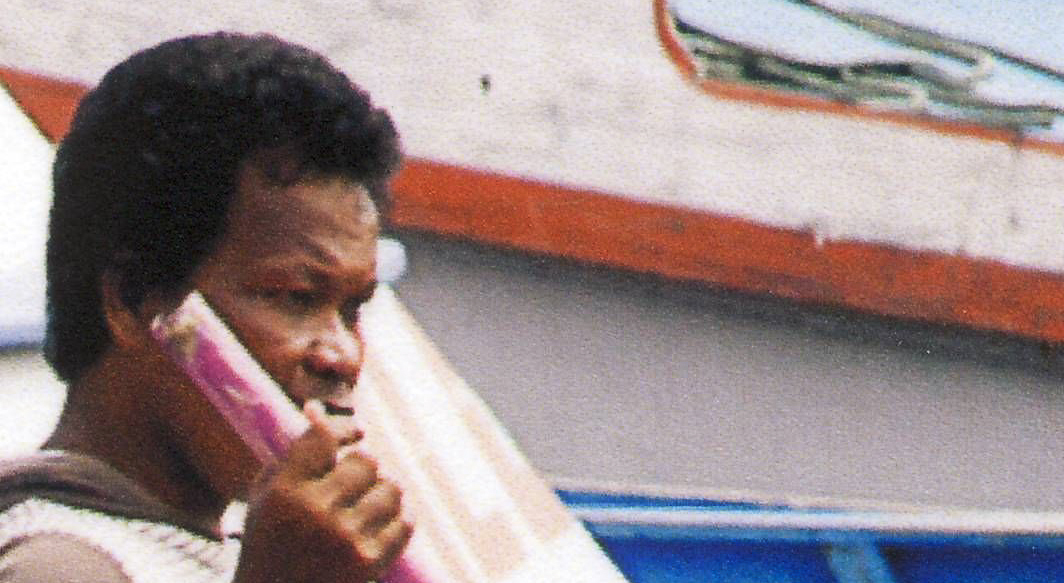

As already stated before, the 240ppi seting has not yet reached the optimum print resolution. You can also see this in the real printout in a less sharp image that also lacks a little micro contrast. With 360ppi the image looks very good, details are better resolved and the micro contrast clearly increases. On the other hand, the step to 720ppi is marginal. The resolution is slightly better, but you can hardly see it in the real print. On the other hand, the micro contrast already decreases a little. Surfaces of the same color, e.g. the boat to the right of the face, have a very similar structure.
printing speed
We have now discovered that deactivating bidirectional printing at 1440dpi screen resolution achieves the greatest quality gain. It was also shown that an increase in screen resolution to 2880 results in a finer structure in even areas. The step from 2880 bidirectional to 2880 unidirectional was visible, but marginal. If one looks at the printing speeds published by Epson (see below) one can see that a print with 2880 bidirectional takes about the same time as a print with 1440 unidirectional. An 8 "x10" print corresponds approximately to an A4 print. I once measured the time for a 2880dpi unidirectional print (or consulted the printer driver protocol): 7min 18seconds. So the information from Epson seems to be accurate.

Therefore I want to compare the two settings again with a print resolution of 360dpi.
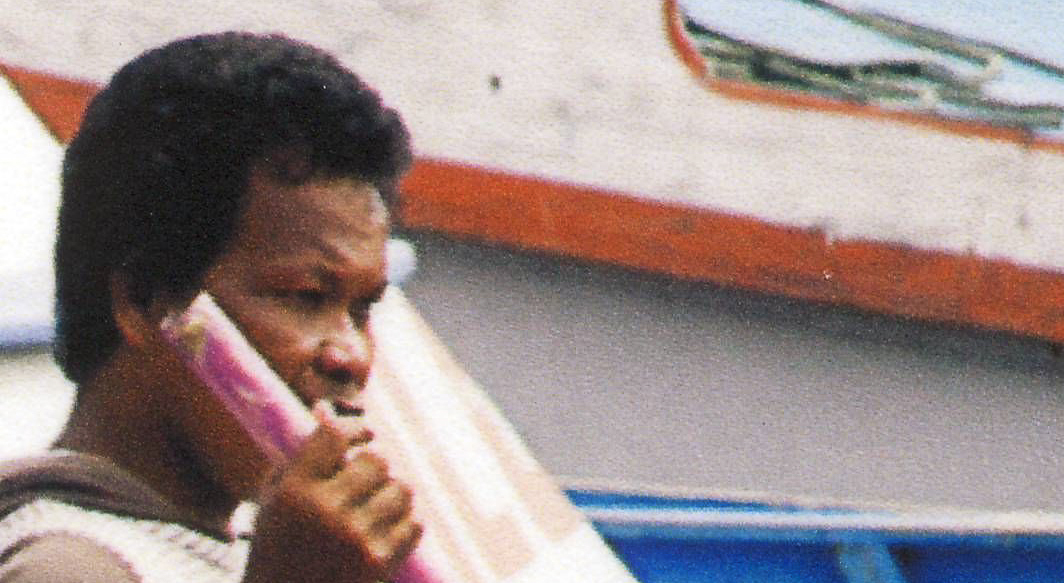
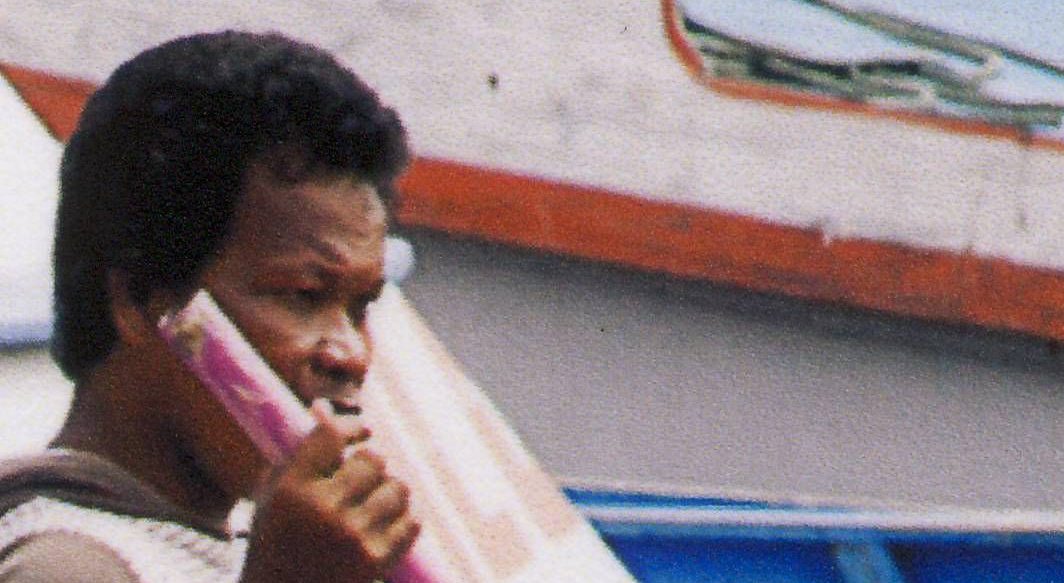
As expected, the print gains in detail when switching to a higher screen resolution, finer structures are resolved better and clearer. But the elimination of bidirectional printing only brings a marginal gain. All this applies under the assumption that you have set the printer pipeline to 360dpi (deactivate option finest details) and send the image with 360dpi to the printer driver. This is also true for Epson Enhanced Matte paper, with gloss or silk matt the deactivation of the bidirectional print definitely result in a better quality. It's best to try it out for yourself, but the variety of settings has already decreased enormously if you consider the print resolution of the printer pipeline.
I have determined the following print speeds for the three prints (A5 print, so an A4 print takes about twice as long):
- 1440ppi_no_bidi_360ppi: 2'30''
- 2880ppi_bidi_360ppi: 2'16''
- 2880_no_bidi_360ppi: 4'42''
This is more or less the same as Epson's time data. In any case, the print is slower with 1440 unidirectional than with 2880dpi bidirectional. Printing 2880dpi unidirectionally takes almost twice as long as printing with the same resolution bidirectionally. With 2880dpi bidirectional you have a very good compromise between quality and speed. I would also like to mention that I calibrated the vertical alignment of my printer before this test. The corresponding tool can be found in the printer driver.

ink usage
On the Internet you can read in different places that the ink consumption is increased when printing with a higher raster resolution. Since the printer driver from Epson records the consumption, it is very easy to check this. All you have to do is install the Epson LFP Remote Panel at Epson.
If you then look under the utilities in the printer driver, you will find the LFP Remote tool at the bottom right.
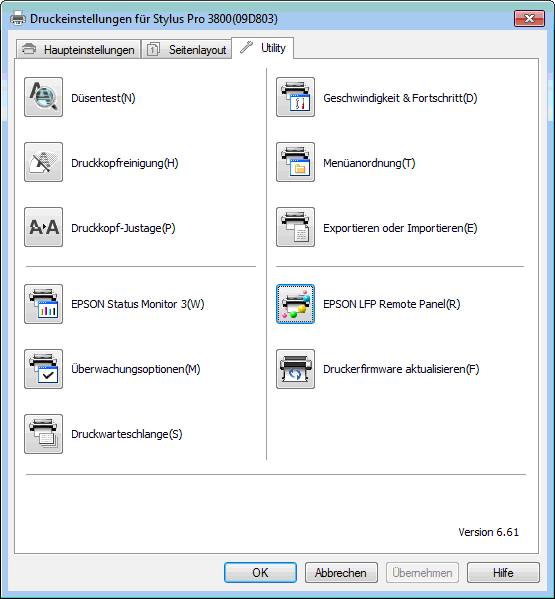
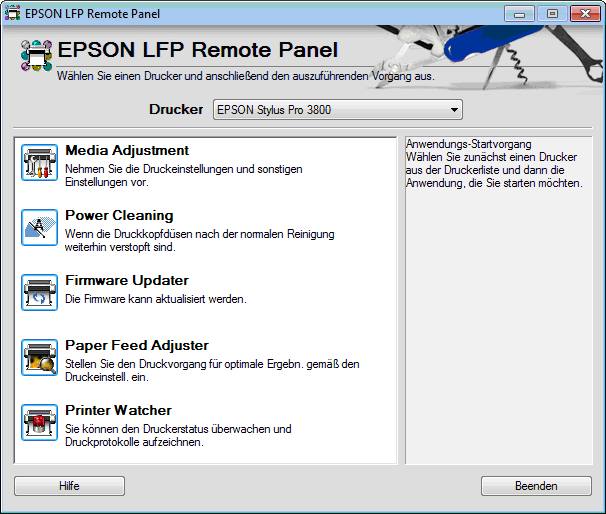
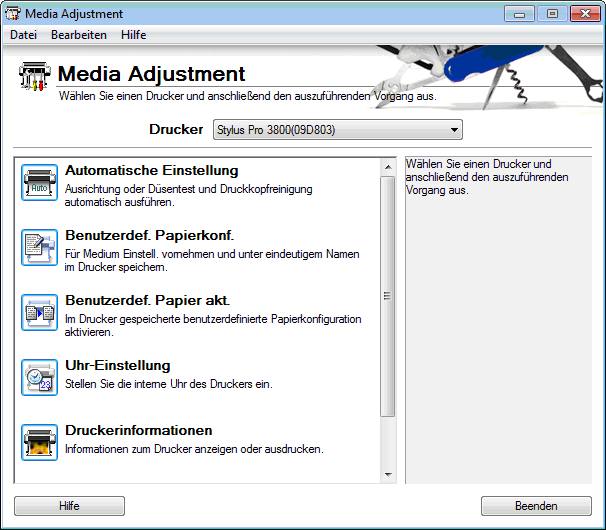
In the LFP Remote Panel you will find the selection Media Adjustment and there the selection Printer Information. Here you can query the protocols of the last prints.
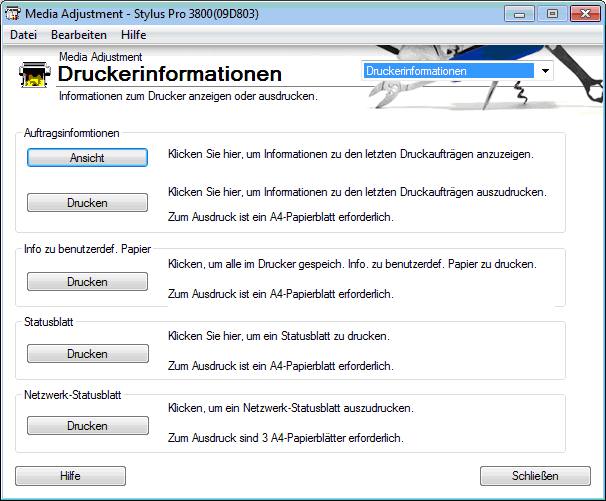
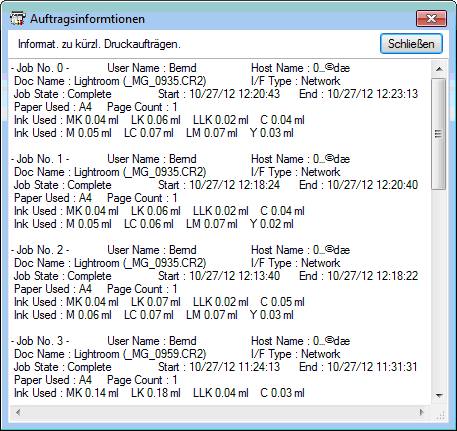
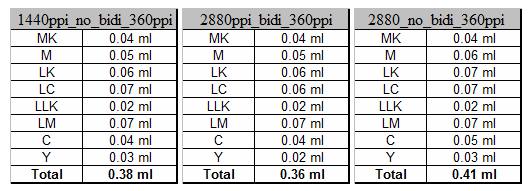
If you now look at the data of the last three prints you will find very similar ink consumption, 2880dpi unidirectional needs approx. 10% more ink than 2880dpi bidirectional; but due to the small amounts of ink (rounding errors) of the individual inks this is difficult to generalize, in any case you don't need twice as much ink if you print with 2880dpi.
summary
Although an inkjet printer makes it much easier to produce good prints, it is not trivial to find the correct settings because they depend on the paper being used. It is therefore important at the beginning to limit oneself to a small number of papers and to get to know them better. The easiest way is to start with paper from the printer manufacturer and also use the original inks in the printer. You can still experiment later. The following settings were determined for the combination of Epson Enhanced Matte Paper in the Epson 3880 with Ultrachrome inks described here:
- screen resolution 2880dpi, bidirectional printing (compromise between quality and speed)
- deactivation of 'finest details' and 'Smooth edges'.
- the image data is transmitted to the printer with the native resolution of the Epson printer of 360dpi.
Those who have a lot of time can also deactivate the bi-directional print at 2880dpi and benefit from a minimal quality gain; but you have to look very closely to see the difference.
For other papers other combinations can be more ideal.