Epson 3800/3880 maintenance
Introduction
My Epson 3800 Pro inkjet printer is often in use. It is a very reliable printer and apart from a few cleaning cycles at irregular intervals it needs practically no maintenance. Single ink nozzles that are clogged are the only problem, which can be easily solved by a cleaning cycle with a test print. Only from time to time a second or even third cleaning cycle is necessary.

The printer has now been in use for over 10 years. During this time, over 3 liters of ink were used and over 6000 pages printed, according to the printer's internal counter. This corresponds to 0.5ml per page. According to my own measurements, however, the ink consumption is about 0.8ml per A4 sheet. And since I practically always print A4 or larger (often up to 3m long 17" panoramas) the measured consumption per page would have to be much higher. The ink loss for cleaning needs also to be added. But this will not be discussed further here, my primary concern here is to give you a rough idea of the age and use of the printer.
After more than 10 years, the first signs of wear and tear are now appearing. The printer loses black
ink, which then settles on the print in the form of unsightly drops and ruins it. The cause of this
phenomenon can be either a leaky ink switch or a leaky ink seal (damper). Both are part of the so-called
ink delivery system
, i.e. the system for supplying ink from the ink cartridges to the print
head. In order to understand the whole thing a little more clearly, I will now briefly describe how the
ink is transferred from the cartridges to the paper.

The ink is put under pressure so that it flows from the cartridges to the print head. An air pump is used to press air into the cartridges. The sound of the air pump is clearly audible every time the printer is started. The air pump supplies all colour channels with air pressure. As soon as the pressure drops below a certain level during the printing process, it is raised again by the pump. As long as no ink nozzles are open, the pressure remains stable. When an ink nozzle is opened in the print head, a little ink escapes due to the increased pressure and as the air pressure in the cartridges is maintained, ink flows from the cartridges through the hoses to the print head. So the whole system is constantly under pressure. Since the ink cartridges of the Epson 3800 are fixed at the front, the ink is transported to the print head via tubes.
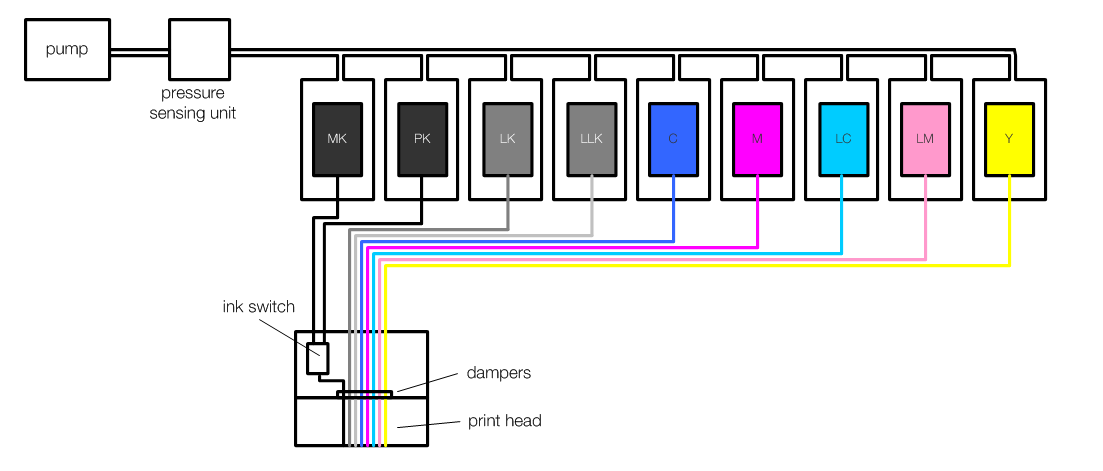
The Epson 3800 has 9 different ink cartridges, namely MK (Matte Black), PK (PhotoBalck), LK (Light Black), LLK (Light Light Black), C (Cyan), M (Magenta), LC (Light Cyan), LM (Light Magenta) and Y (Yellow). It is important that only 8 inks are required for printing, the print head also has only 8 channels. Depending on the paper used, either Matte Black or Photo Black is used for printing. So a switch is needed that switches between MK and PK depending on the ink being used. This switch is located right next to the print head, so 9 tubes go from the cartridges to the print head. At the end of the tubes there is a unit which contains the ink switch and is attached to the print head. The seals of the individual color channels are also located on this unit. Since the seals are located behind the switch, there are now only 8 seals that are used at the junctions to the print head.
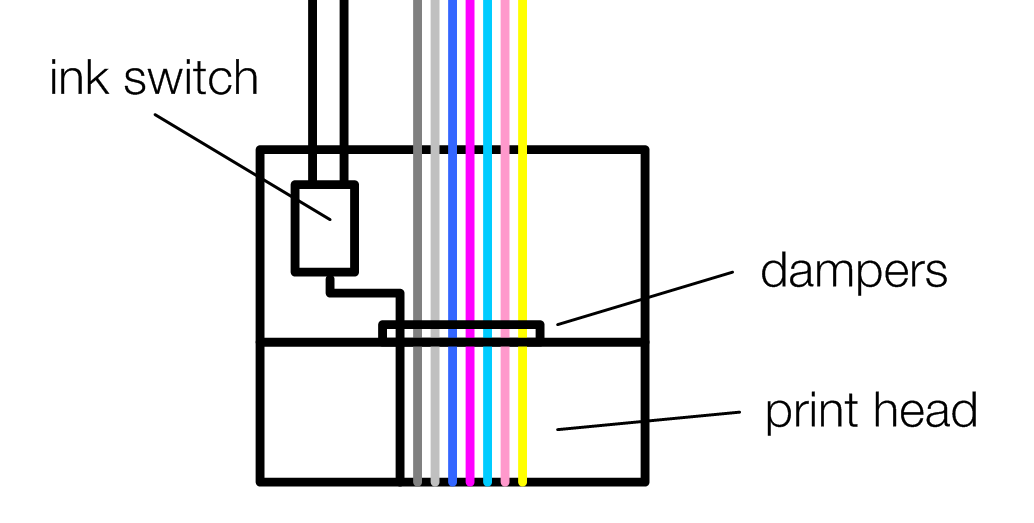
In my case the seal of the LLK channel was leaking. I determined this by replacing one black ink after the other with ink cleaning fluid. The whole procedure is a bit complicated, because you have to empty the whole tube of the ink used. I was particularly interested in whether a seal or the switch was affected. With the latter, I hoped to get it going again by running through the cleaning fluid. Since a seal was concerned however the seal had to be changed.
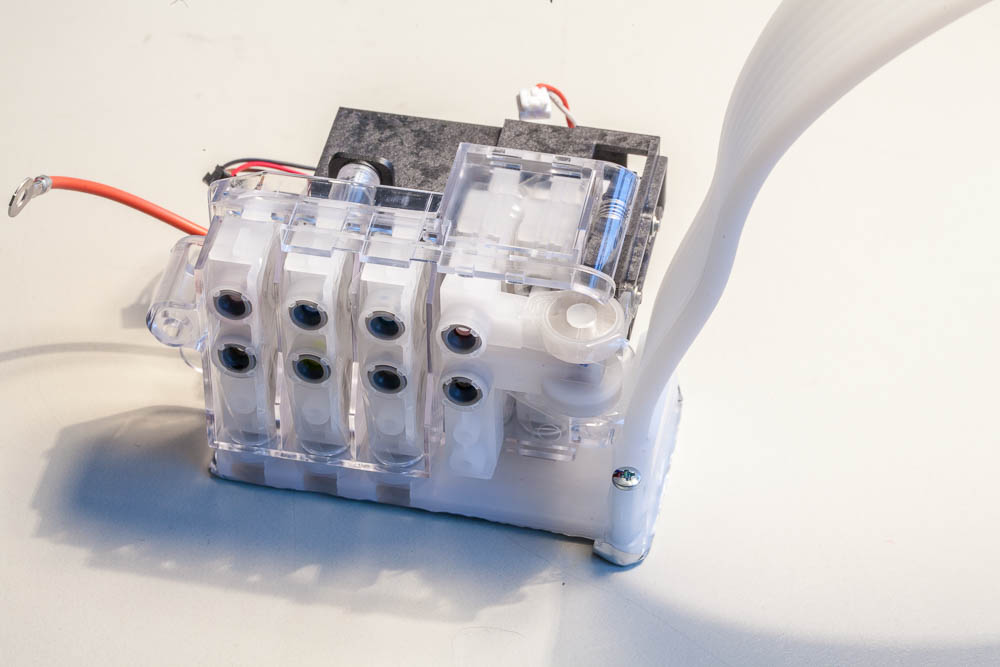
According to Epson, the entire ink supply system is a wear part that has to be replaced every few years. The supply system includes the holder for the individual cartridges, the hose system and the unit with the seals and the switch. However, it is also possible to change the individual seals. The big advantage of changing the whole system is that virtually no ink flows out of the system and you keep a relatively clean workplace. However, as soon as the system is opened at any point, ink flows out which has to be captured.
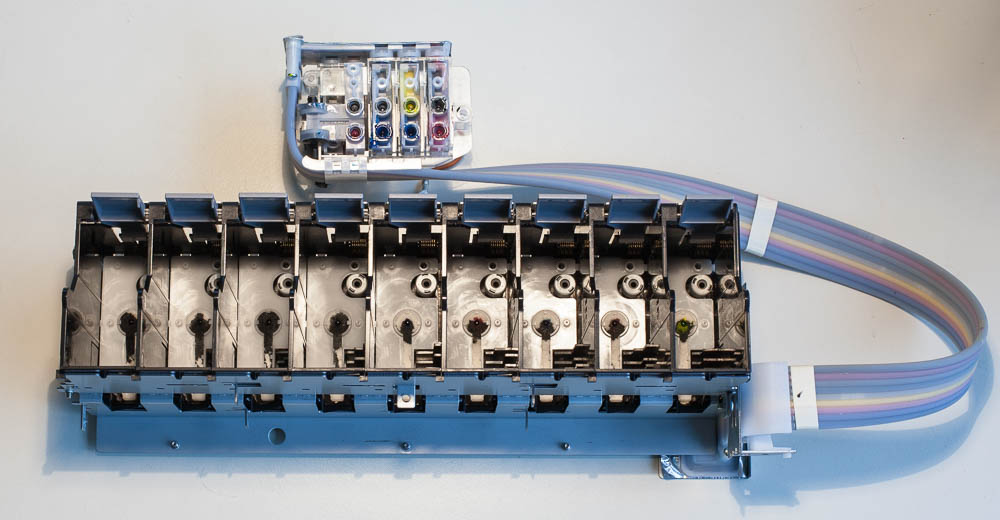
Changing the ink supply system is not particularly difficult. However, it is advantageous to obtain the
Service Manual of the Epson 3800, which describes exactly how to disassemble the printer. Unfortunately,
it is not specified exactly which parts have to be removed in order to remove the ink supply system, but
if one goes through the disassembly according to the manual one after the other and removes up to and
including the upper device cover (housing upper), one can remove the ink supply system in the following.
After the housing upper
follows removing the ink system mechanism
and there you
can of course skip the part with the pump, as it is not part of the ink supply system. In my manual
version it continues with cover, cr
, the cover of the print head.
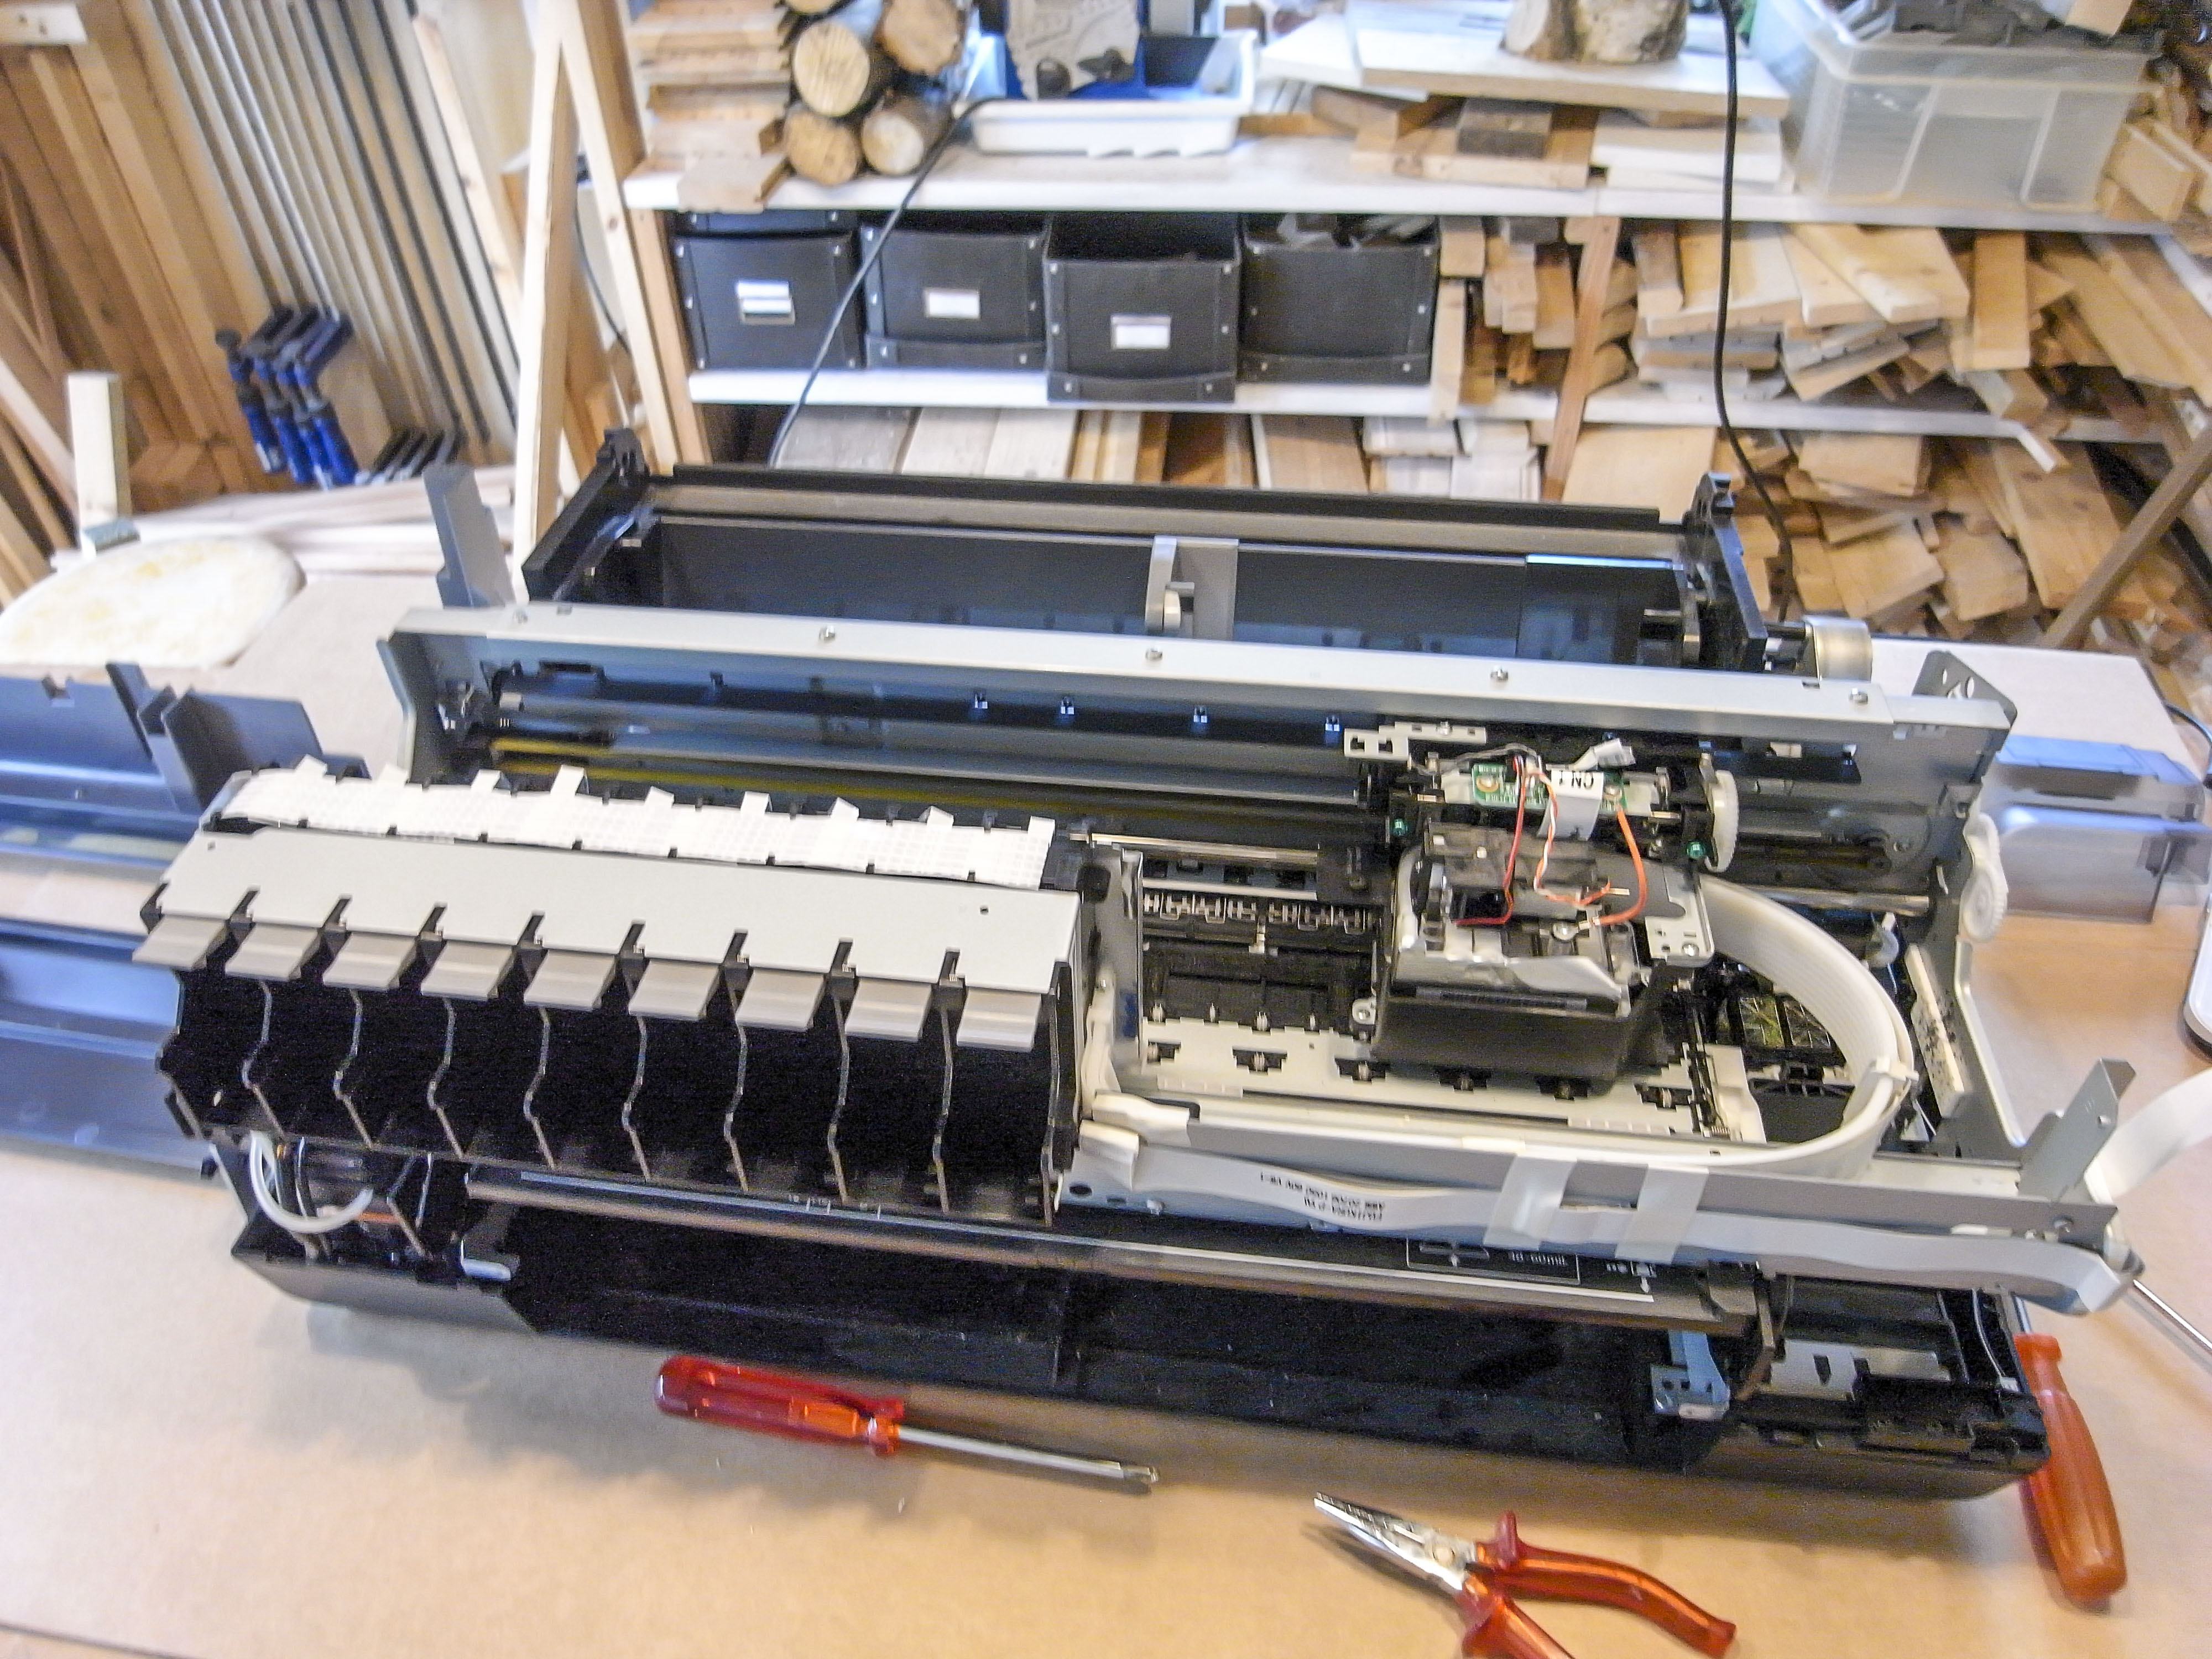
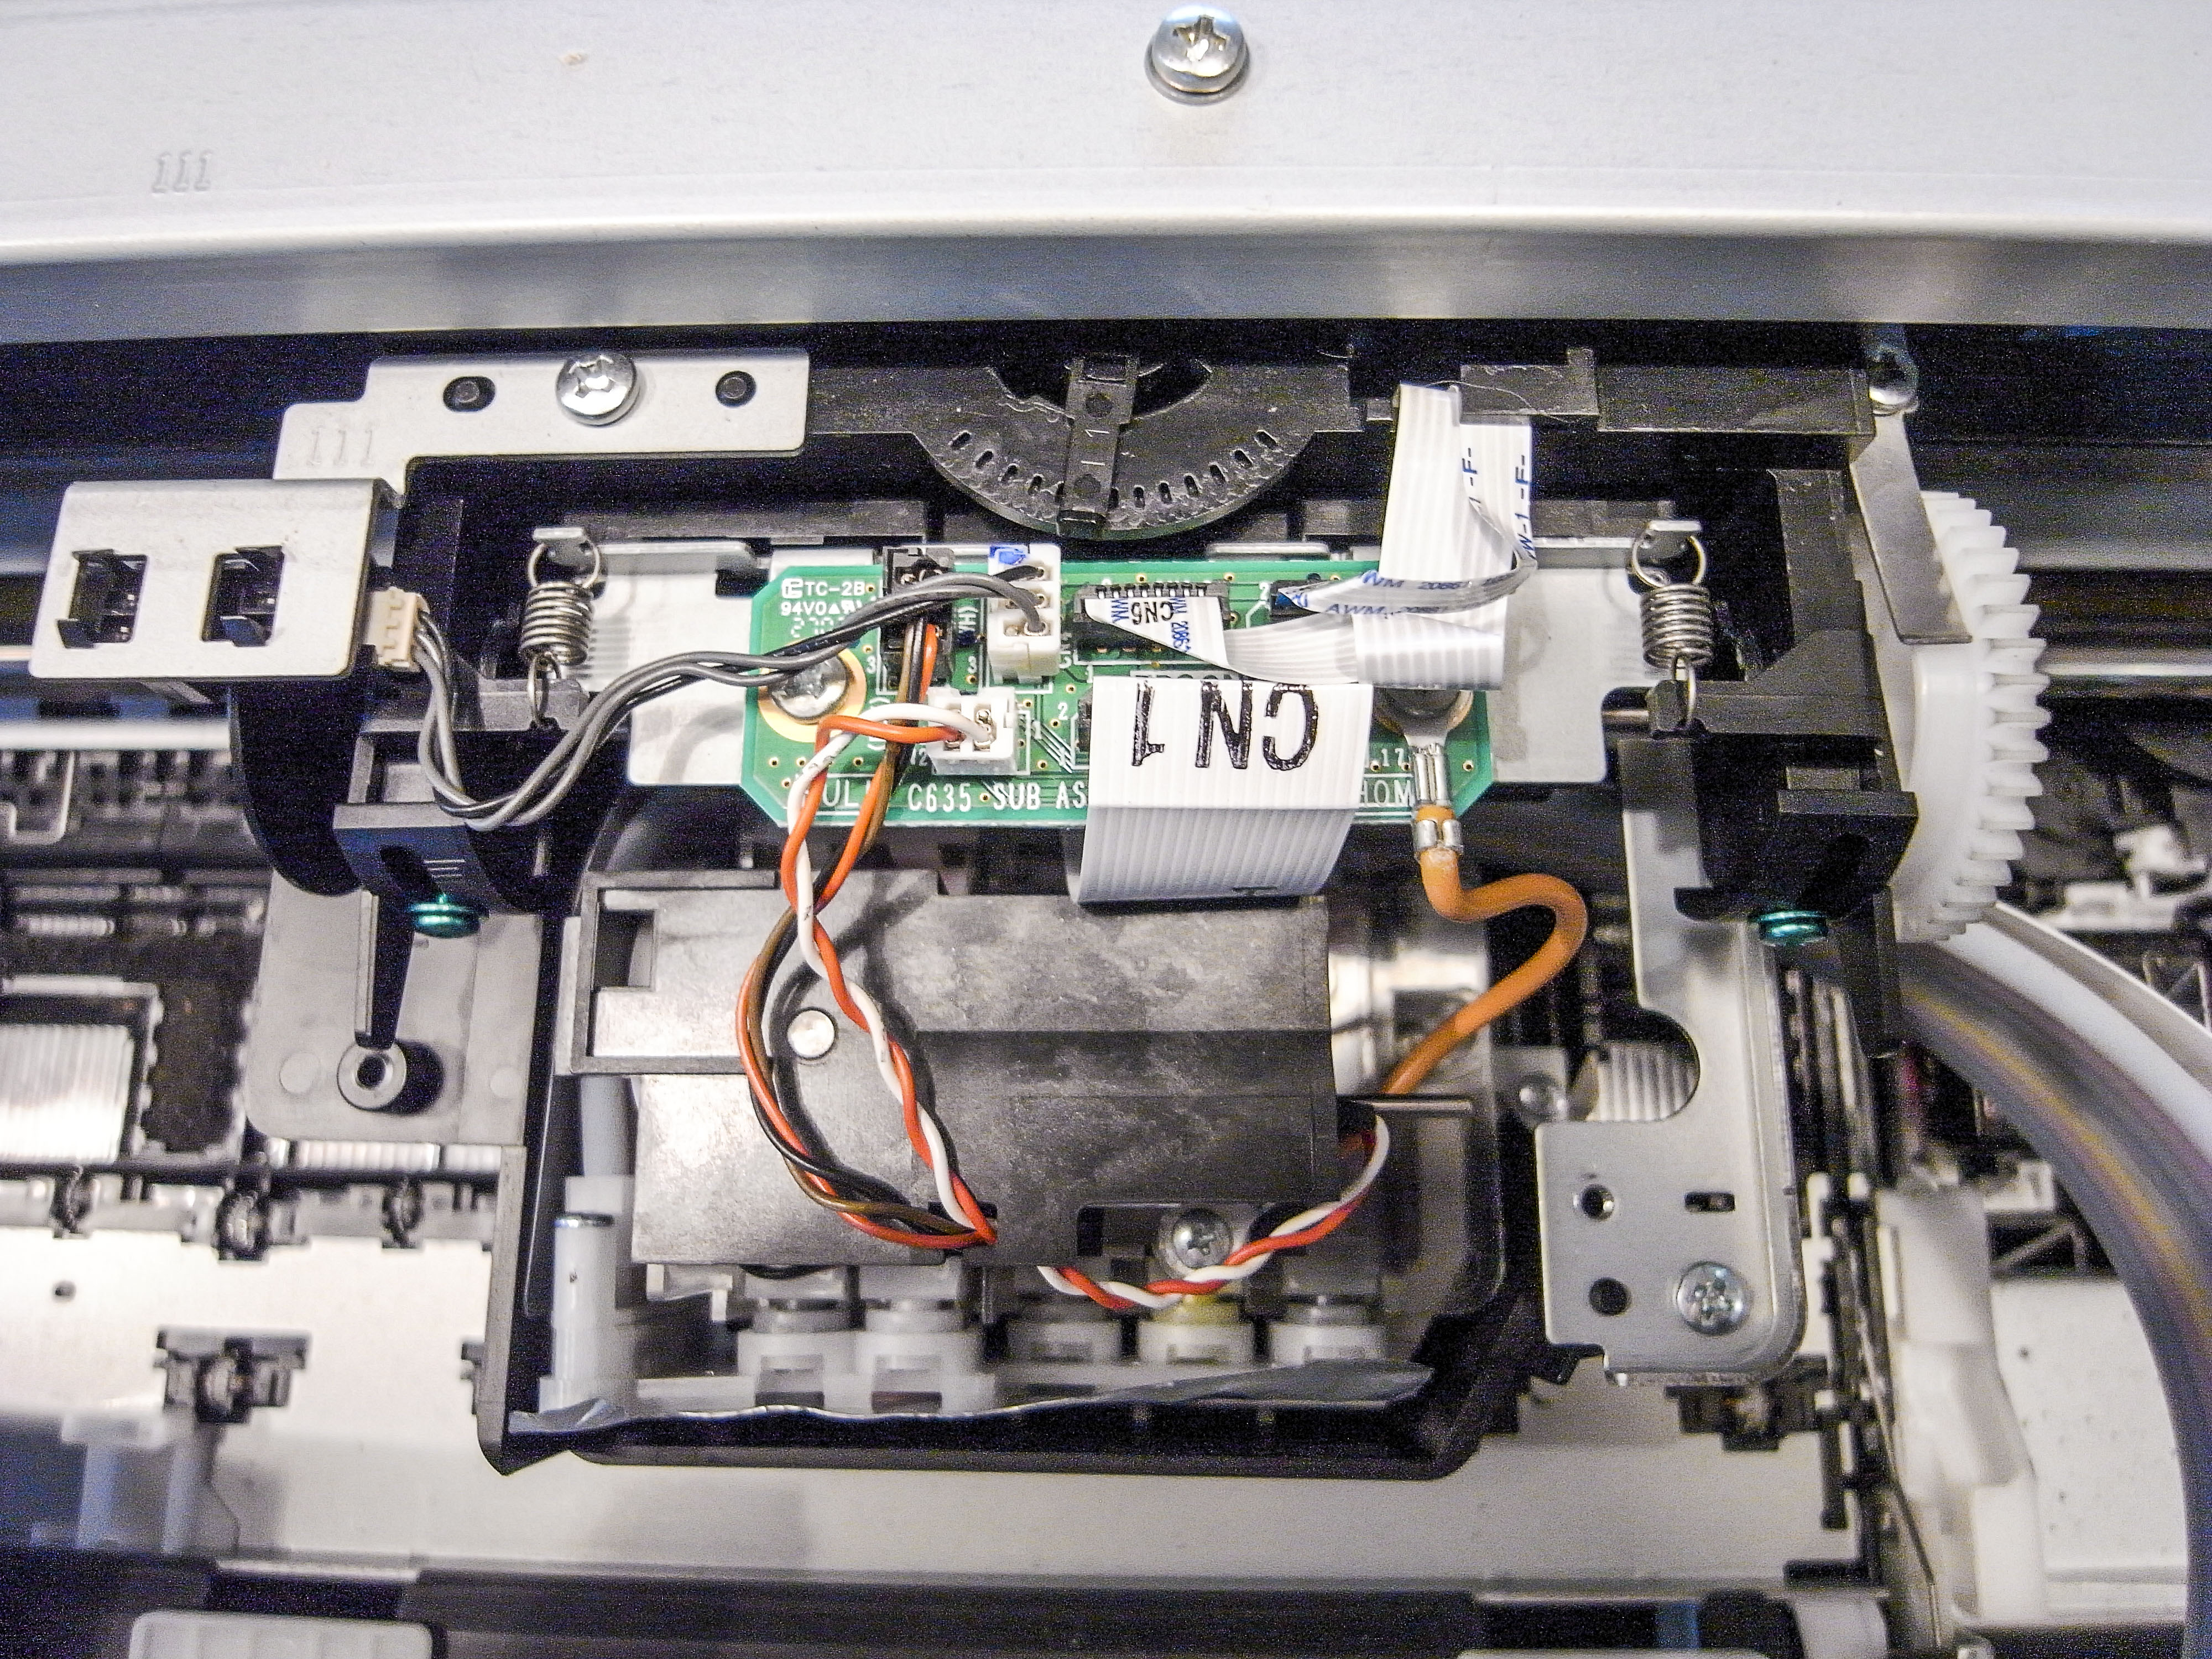
Unfortunately something went wrong with my first attempt and the printer could not build up air pressure
anymore (Error Code 1403). This indicates a leak in the system, which I couldn't find. I then
reinstalled the old system and the air pressure could be restored. So I had to assume that the leak was
in the new ink supply system. The supplier immediately sent me a replacement and when I installed it
everything went smoothly. In order to transport ink into the hoses I carried out a Power
Cleaning
directly over the control at the printer, followed by 2 to 3 normal cleanings and the
printer was ready for use again. To be on the safe side I did an automatic Head Alignement
.
Since then I have printed several meters of roll material and the quality of the prints is perfect. On
the internet and also in the manual you can find hints that after a change of the ink supply system the
software Espon adjust
has to be used to carry out different procedures. Unfortunately I
couldn't use the software because of a communication error. Because the printer ran error-free after the
different cleaning cycles, I don't think the software is really needed.
This whole service intervention can of course also be carried out by a specialized technitian. However, according to information from the Internet, this intervention is not quite expensive. Up to 800 USD are reported including ink. I paid for the new ink supply system approx. 135EUR, whereby approx. 60EUR shipping and 20EUR customs were added, thus a total of approx. 215EUR. If you only change the single gaskets, you will of course get much cheaper, but then you have to be sure that it is the gaskets and not the switch that leaks.